Starter project
Let's get started with Charter by creating a "Hello World" project, where our players will see a welcome page with some content determined by you.
We'll start with the "Blank" starter template, which contains absolutely no project content. And we'll create each element one by one until we reach our desired result. You can always view the expected result of this tutorial by creating a new project from the "Hello World" template.
1. Start a project
From the Charter home page, click on "Create blank" to create a new project from the "Blank" template.

Name your project and click "Create".
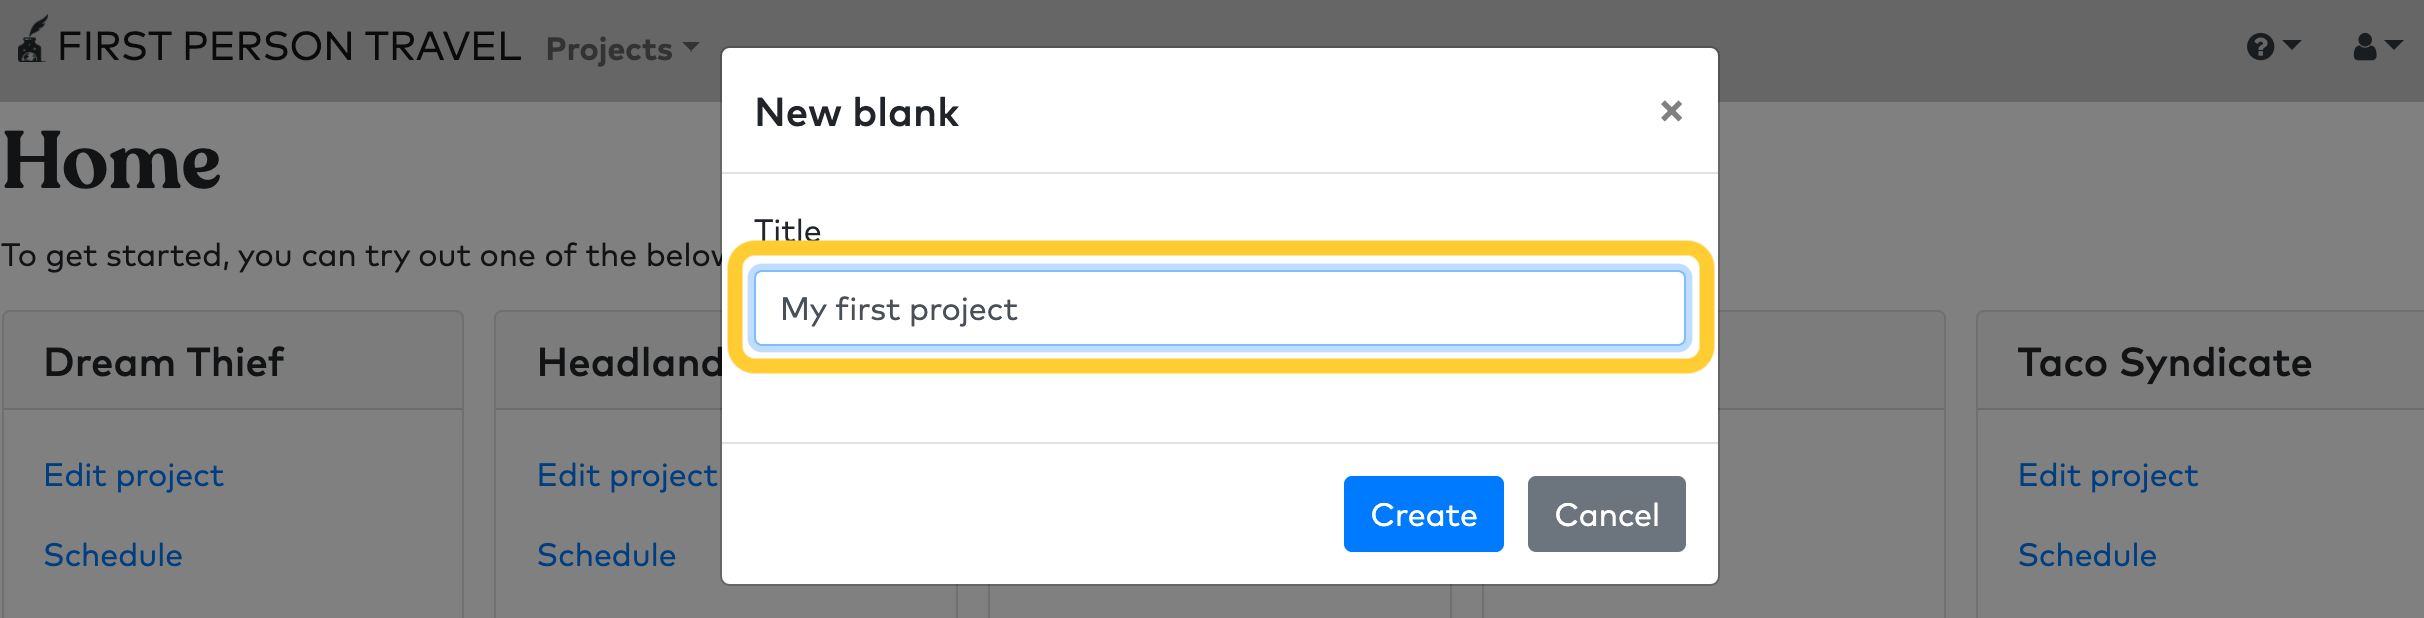
You now have a new project!
2. Add a player interface
First, we'll create an Interface, which is basically a navigable mini-website in Charter that's customized for your players. Every Interface is a set of Pages, and you define in your project how to navigate the player between those Pages.
Navigate to Roles > Add interface.
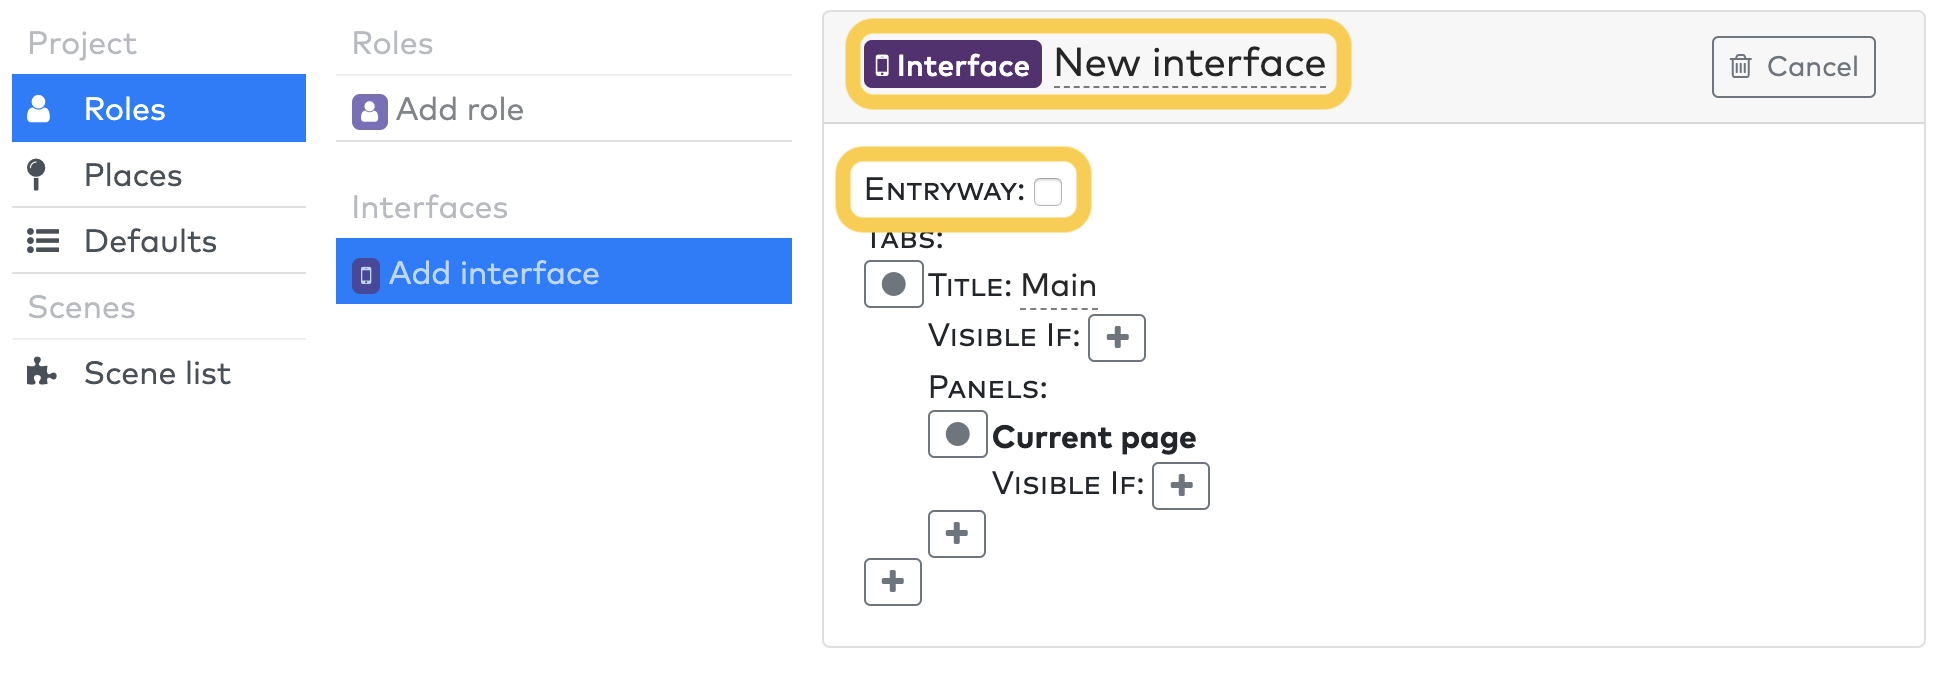
Set a title for your interface by clicking on the default "New interface" title. And check the "Entryway" checkbox: this means players can join your experience via the web.
You can leave the remaining fields empty for now; we'll look at interfaces in more detail in the "Tabbed Interface" tutorial.
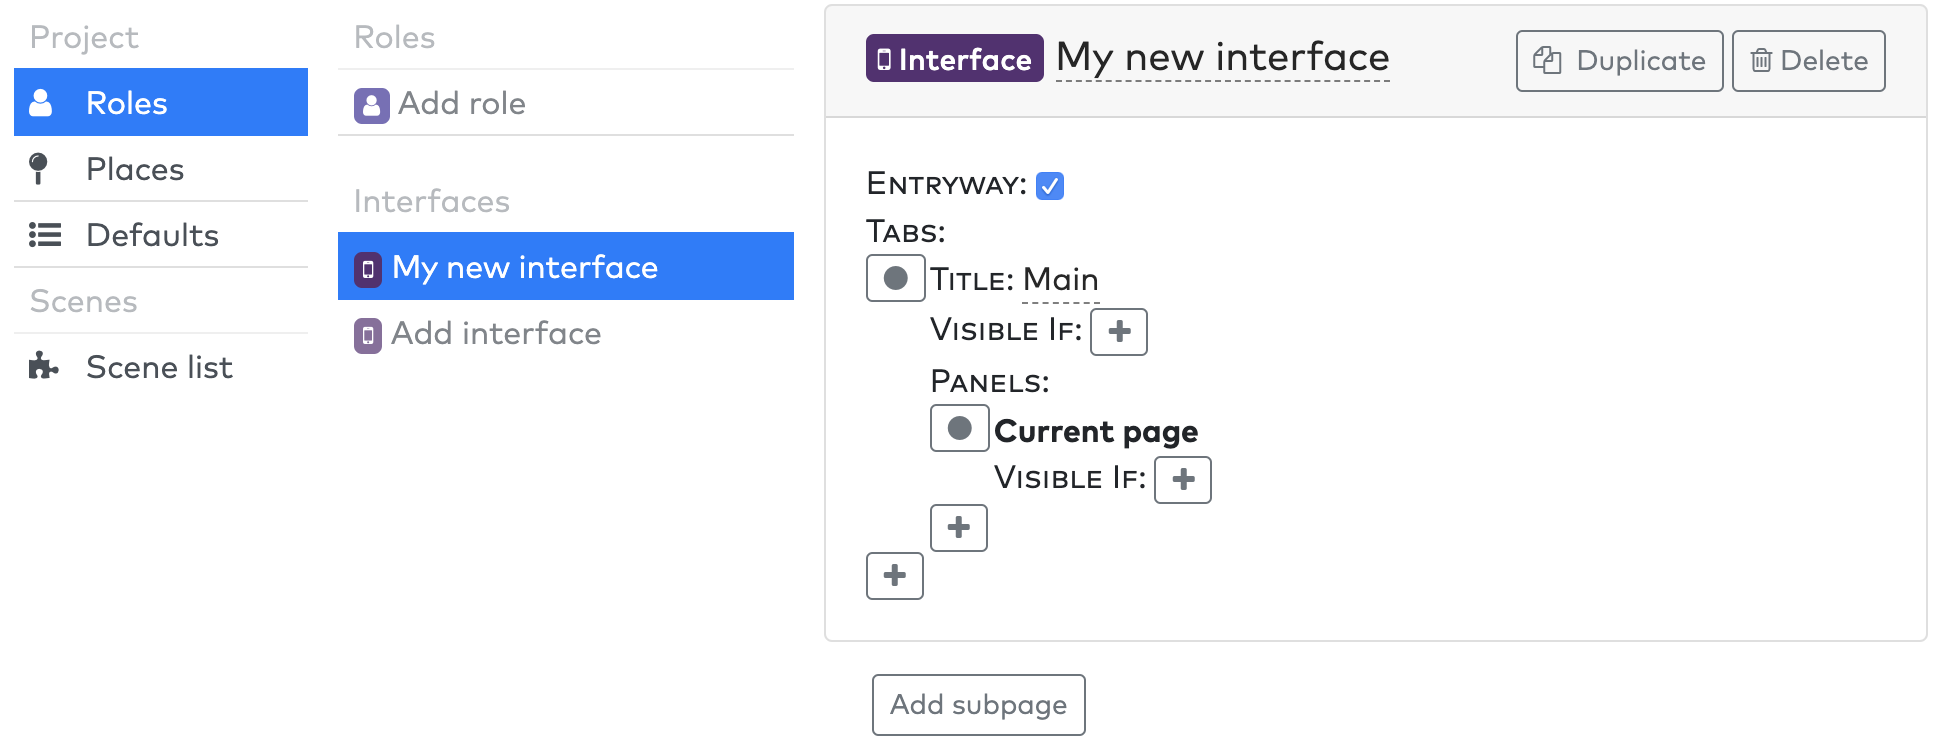
Once you've set these new fields for your interface, it gets its own link in the navigation area.
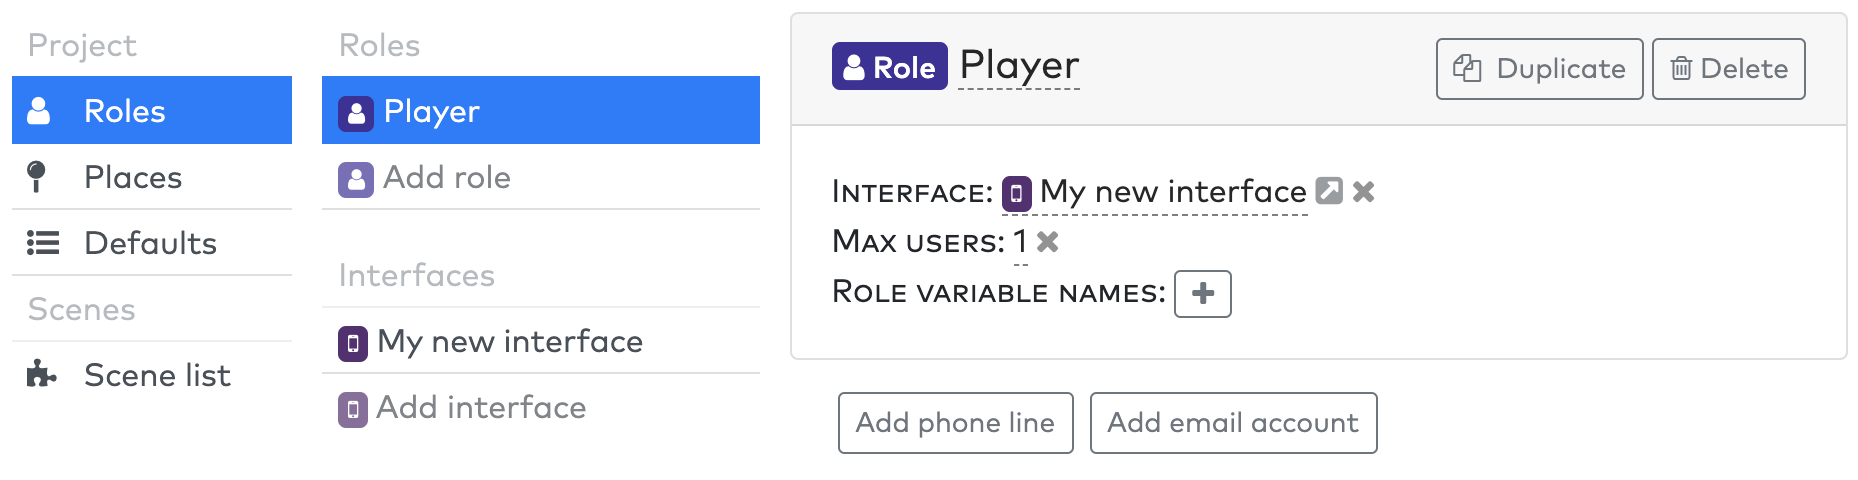
3. Add a player role
Now we'll add a Role for your players. A Role in charter defines a specific part that the participants in your experience will play. For example, a single-player experience will probably have a single "Player" role. A competitive experience between two teams might have a "Team A" and "Team B" role, with multiple users in each role.
Navigate to Roles > Add role.
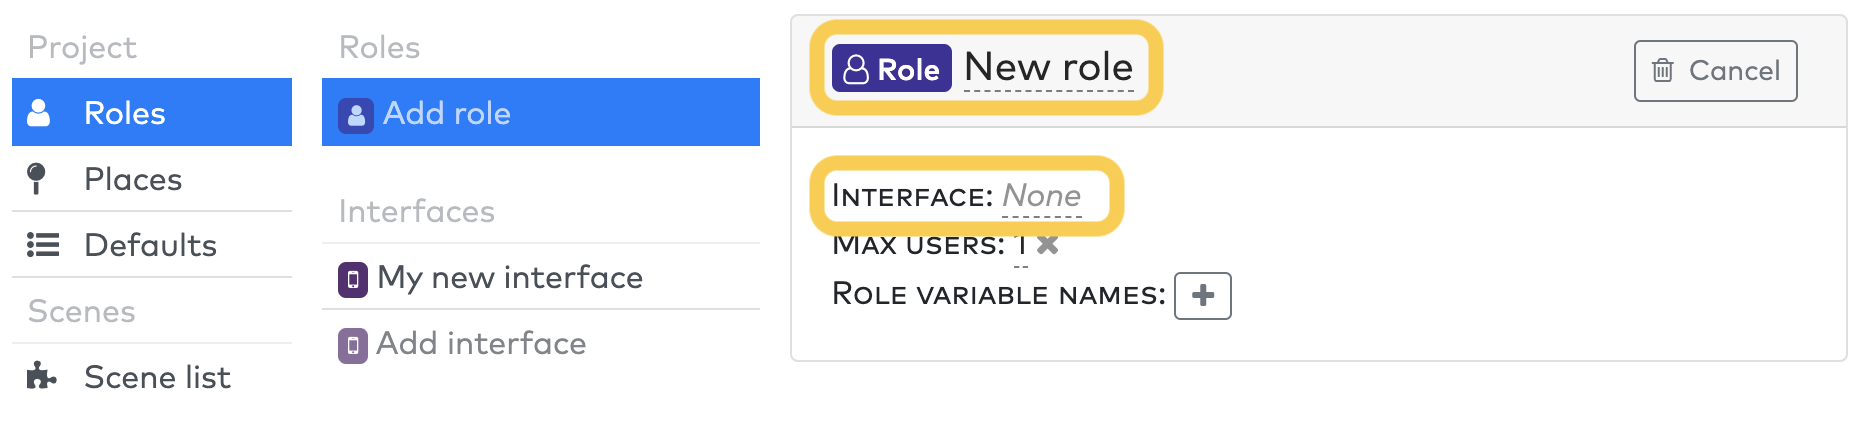
Set a title for your role: something like "Player". And set the role's interface to the name of the interface you just created.
4. Add a first scene
Navigate to Scene list > Add scene.
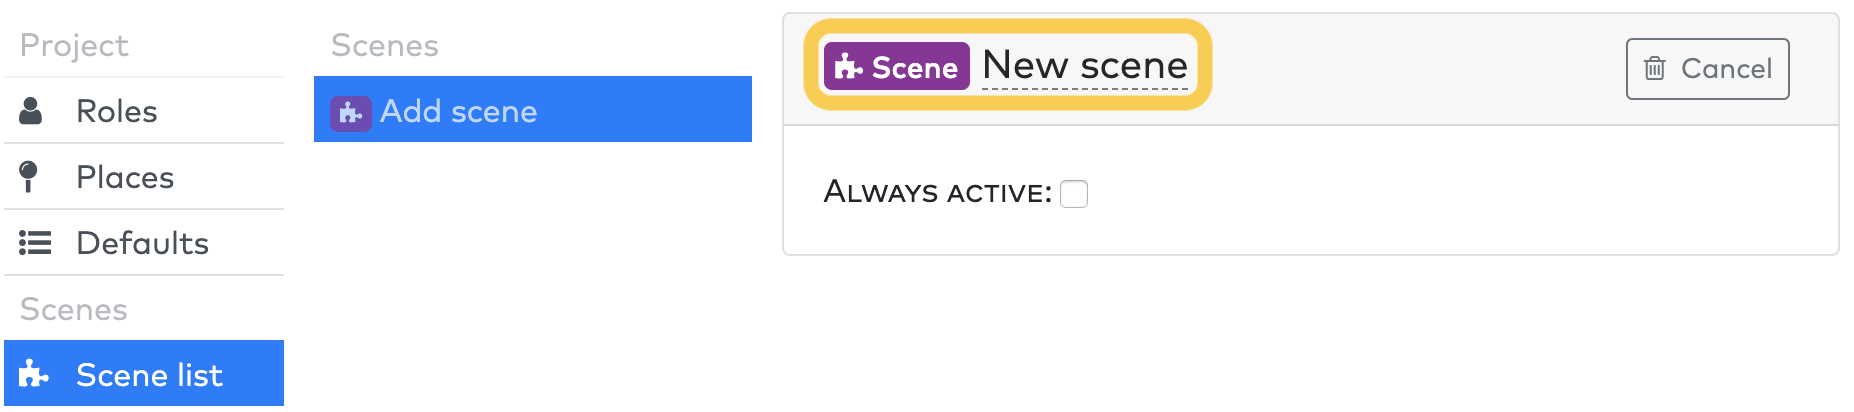
Create a title for your new scene. Scenes are automatically sorted alphabetically.
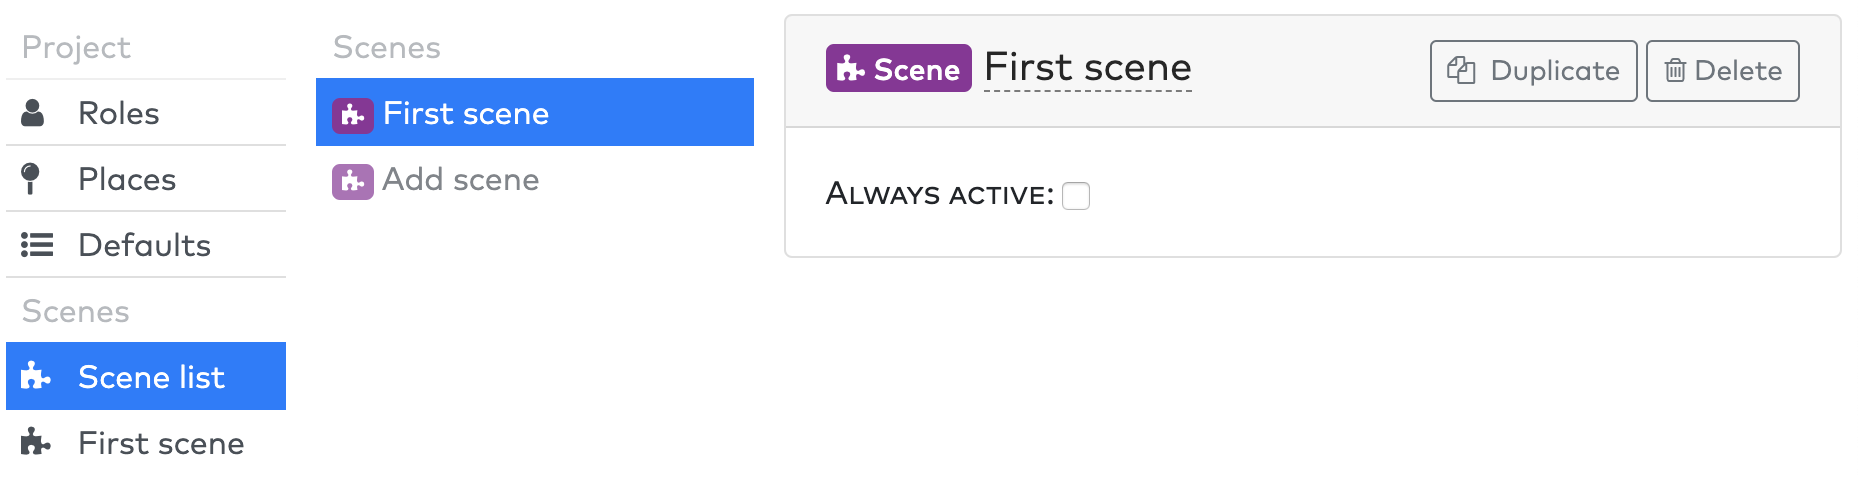
Notice how this new scene is added to the scene list on the left.
5. Add a "Hello World" page
Now navigate to your newly created scene in the Scenes section on the left-most navigation area.
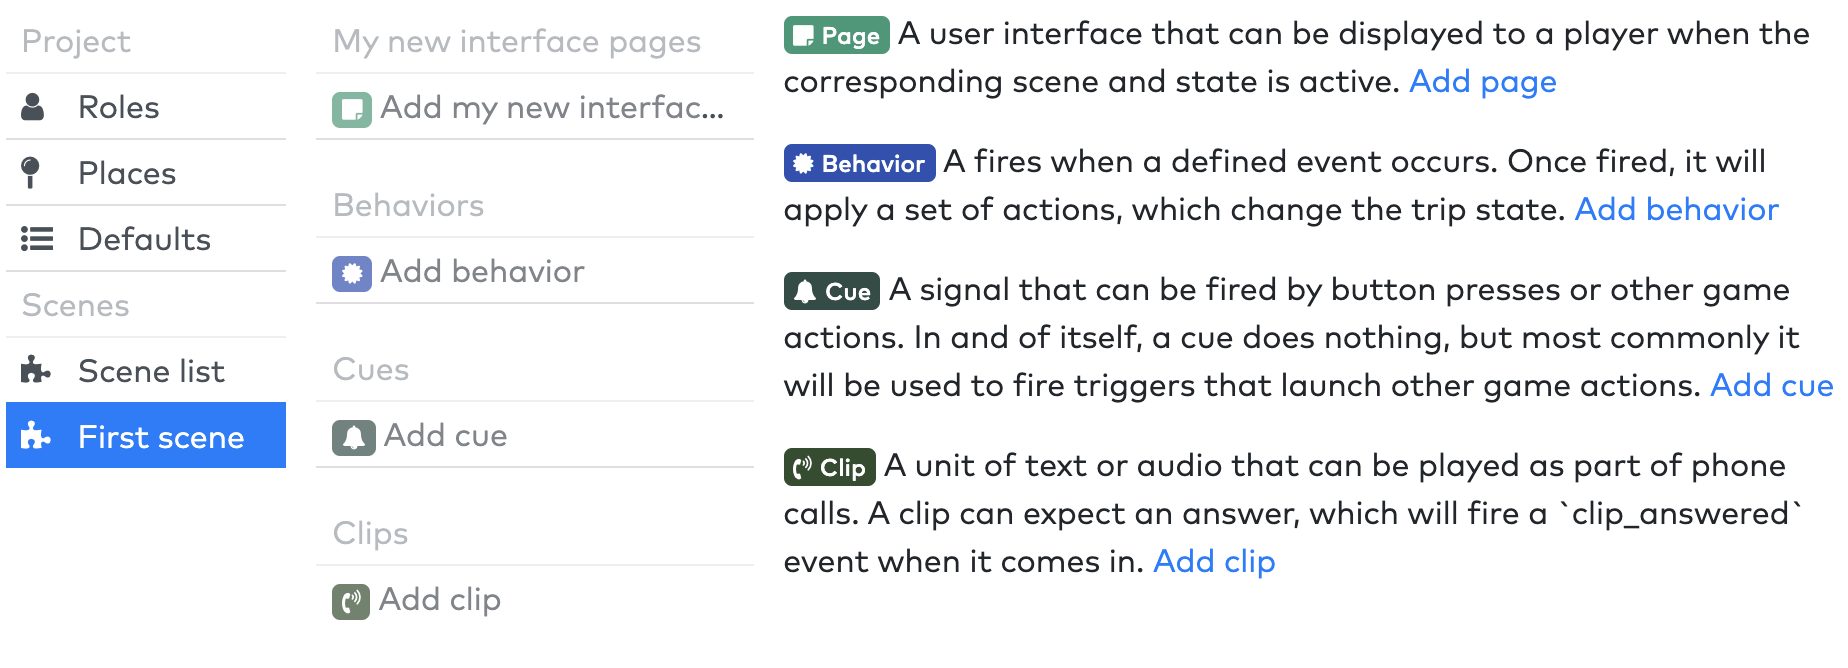
You'll see new kind of elements in the middle navigation: these elements are scoped to this specific scene, and are only active when this scene is the current scene. Since your new experience has only one scene, your experience will start on that scene and these elements will be active.
Click Add new (your interface name) page (you should recognize the name of the interface you created at the start of this tutorial).
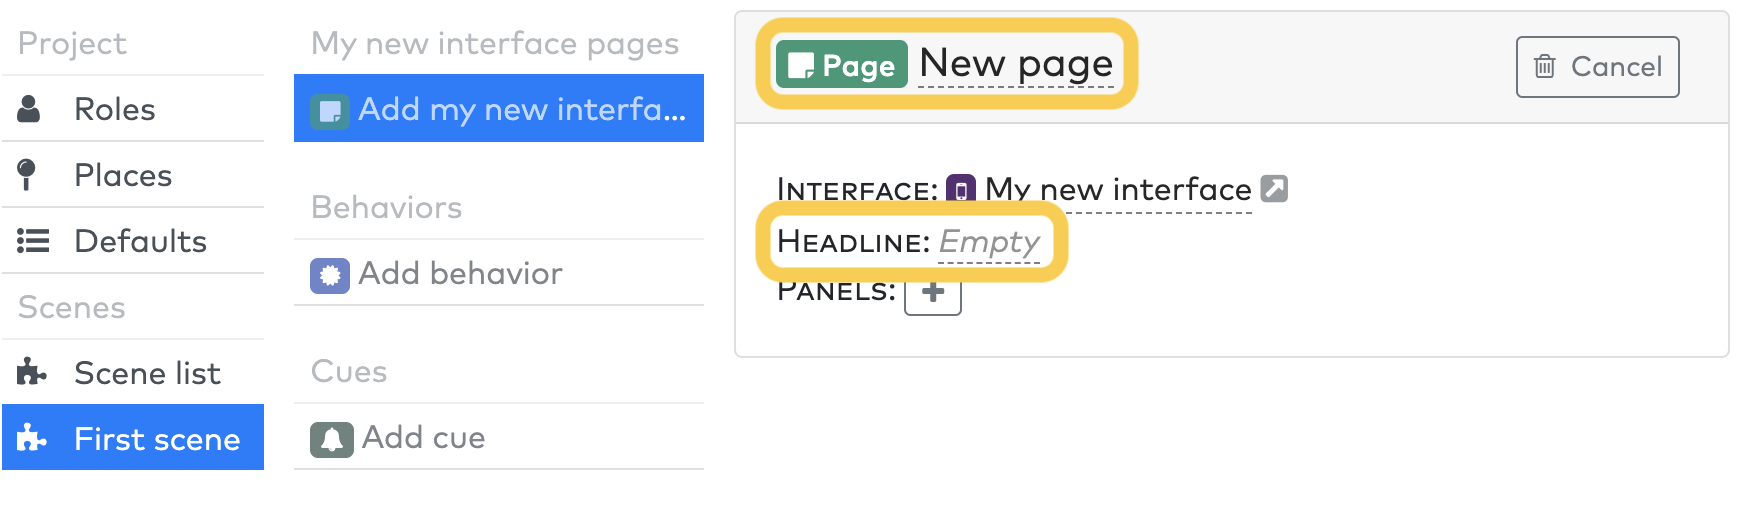
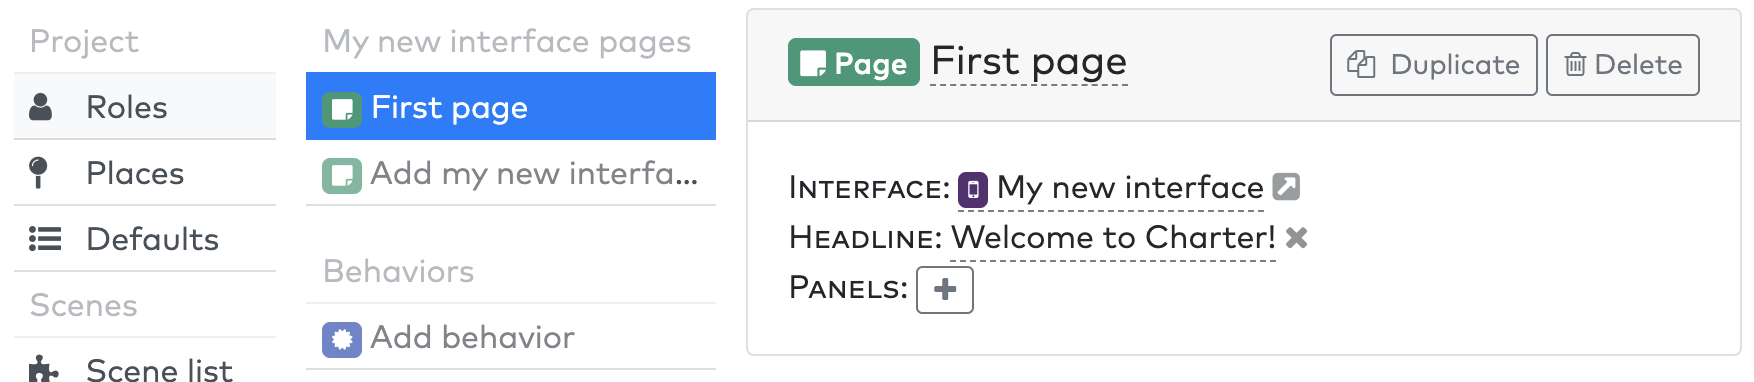
- Add a title for your new page by replacing the default 'New page' title
- Add a headline: this is a top-level direction that will appear in a banner atop the player's screen.
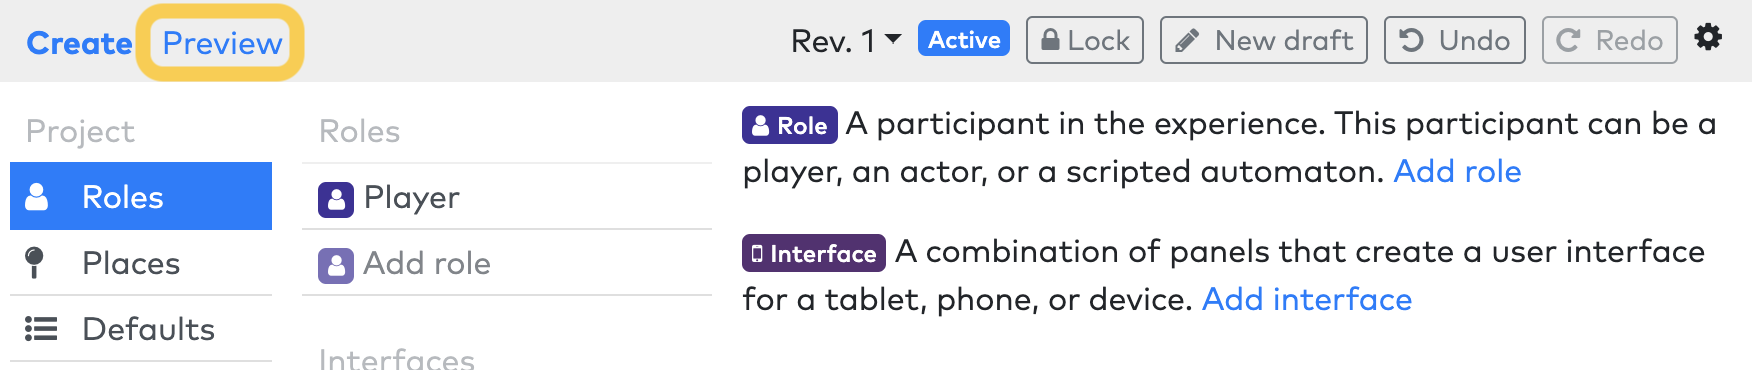
6. Preview your project
Navigate to the Preview tab at the top of the project editing page.
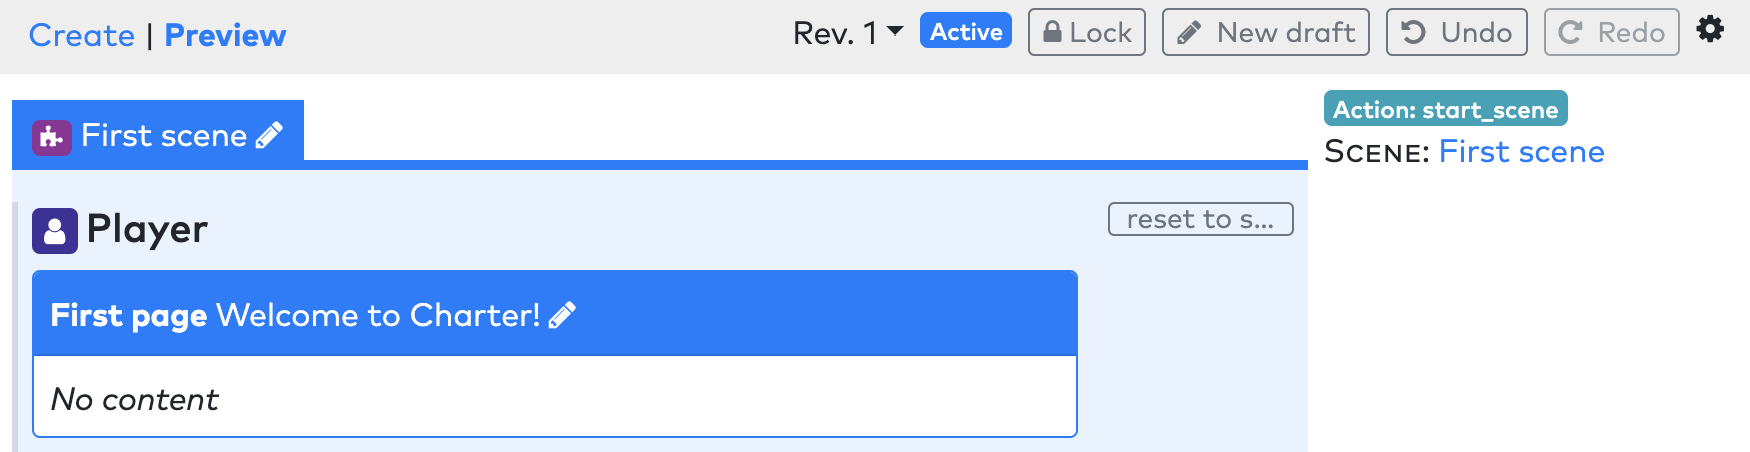
In the Preview section, you can see a quick overview of the layout of your experience, and test the logic and UI. Here, you see that your first scene has started, and your new player role is currently viewing your "Hello World" page.
7. Your first run!
Navigate to the Schedule page at the top bar of your interface.
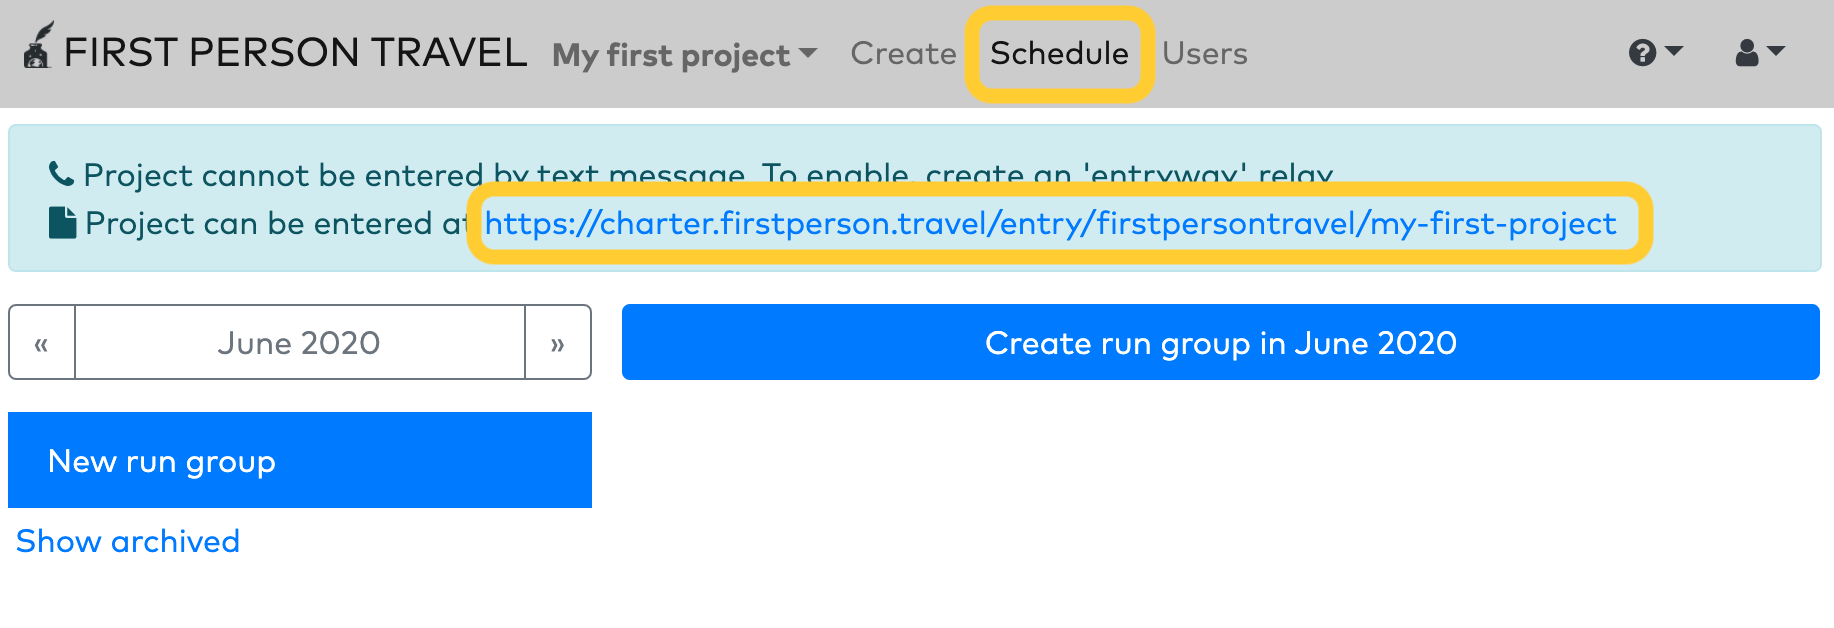
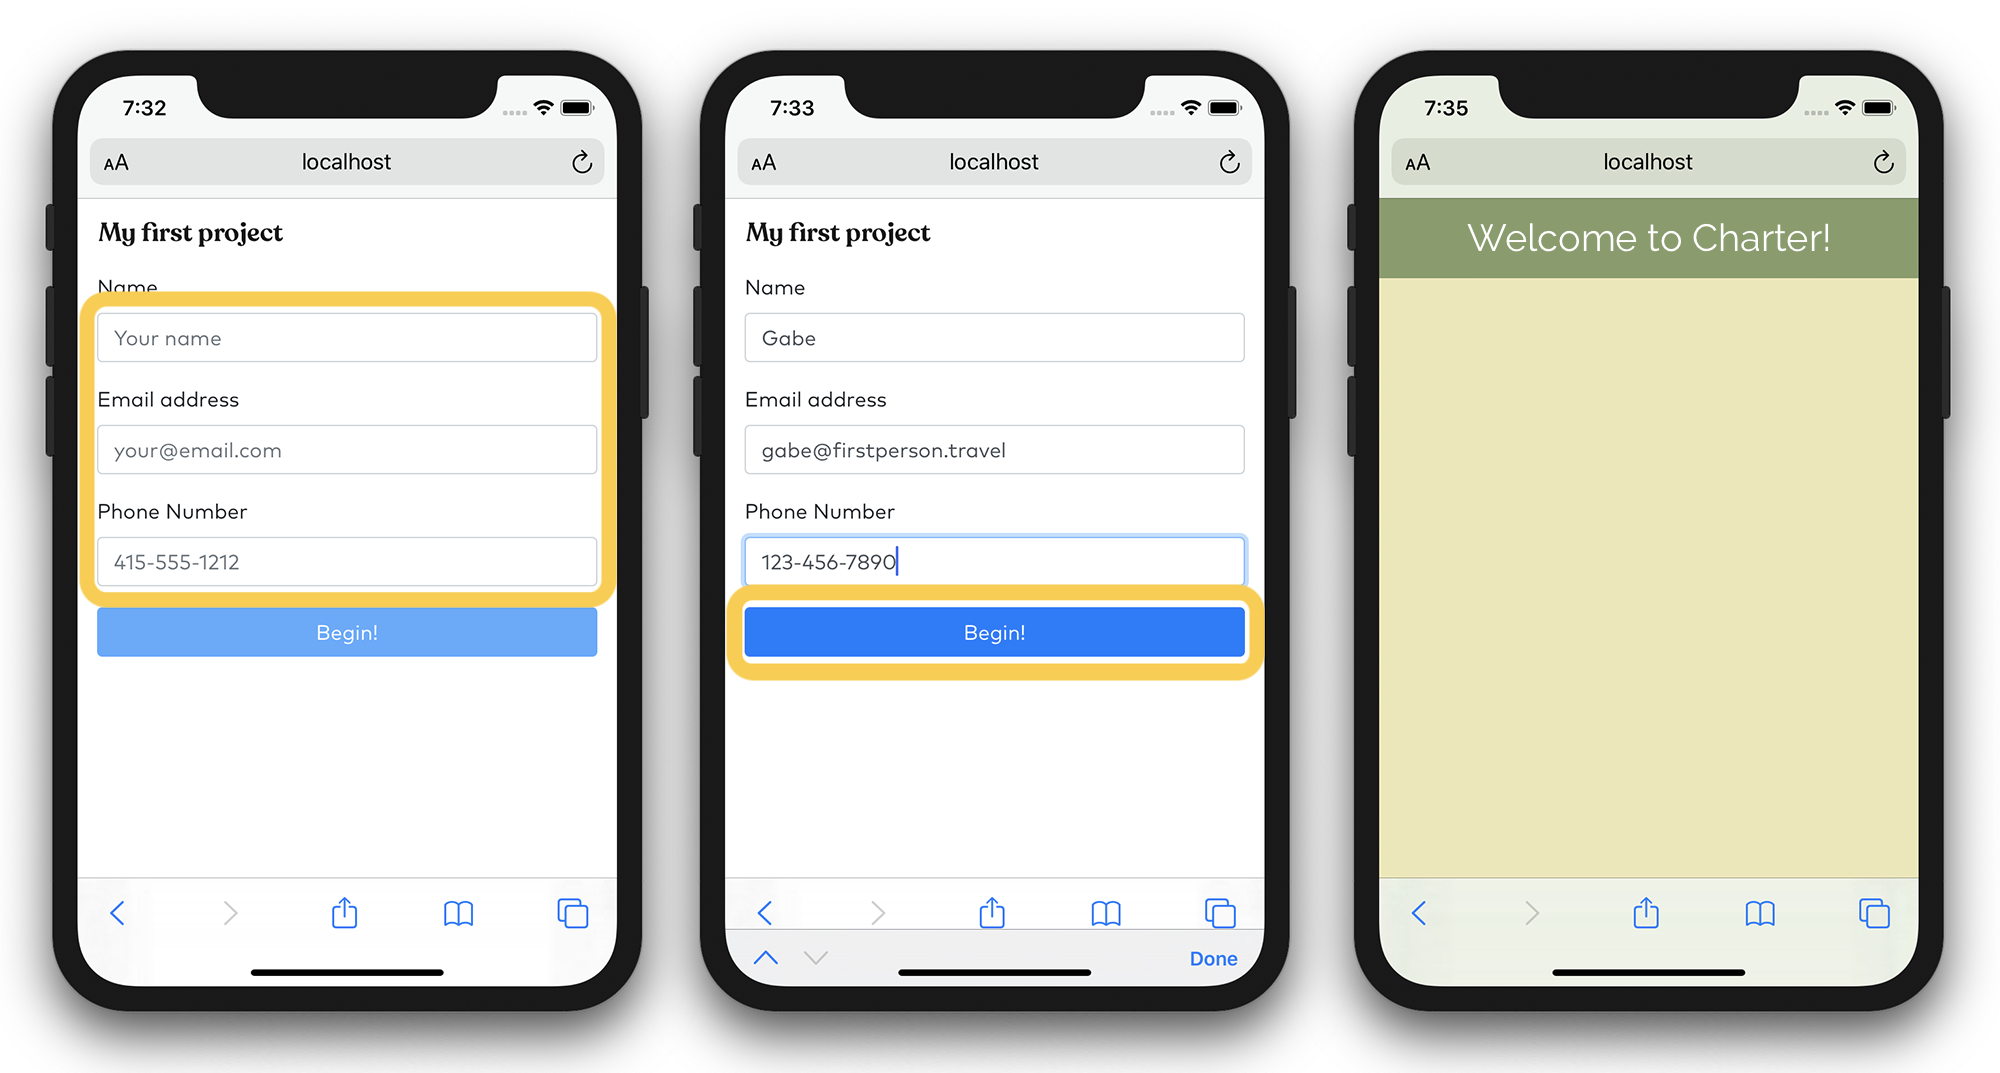
Because you enabled the 'Entryway' option on your interface, you can now start this project by clicking on the highlighted link. You'll be taken to a signup form, which can be filled out either on the web or on mobile. Fill out the form, and click "Begin". You'll then be taken to your page!
Next steps
You've now created and tested your first immersive experience using Charter!
From here, continue onto the next tutorials to learn more about all the functionality in Charter, from text and MMS messaging, to custom user interfaces, to location and mapping, and more.
You can also go to the Operating page to learn more about how to run your experiences live.