Text conversation
In this example, we will create a scripted conversation with a fictional character. We will cover sending and receiving text and media messages over SMS/MMS, and using logic and conditions to play out differently based on the responses from the player.
1. Start a project
From the Charter home page, click on Create blank to create a new project from the "Blank" template.

Name your project and click Create.
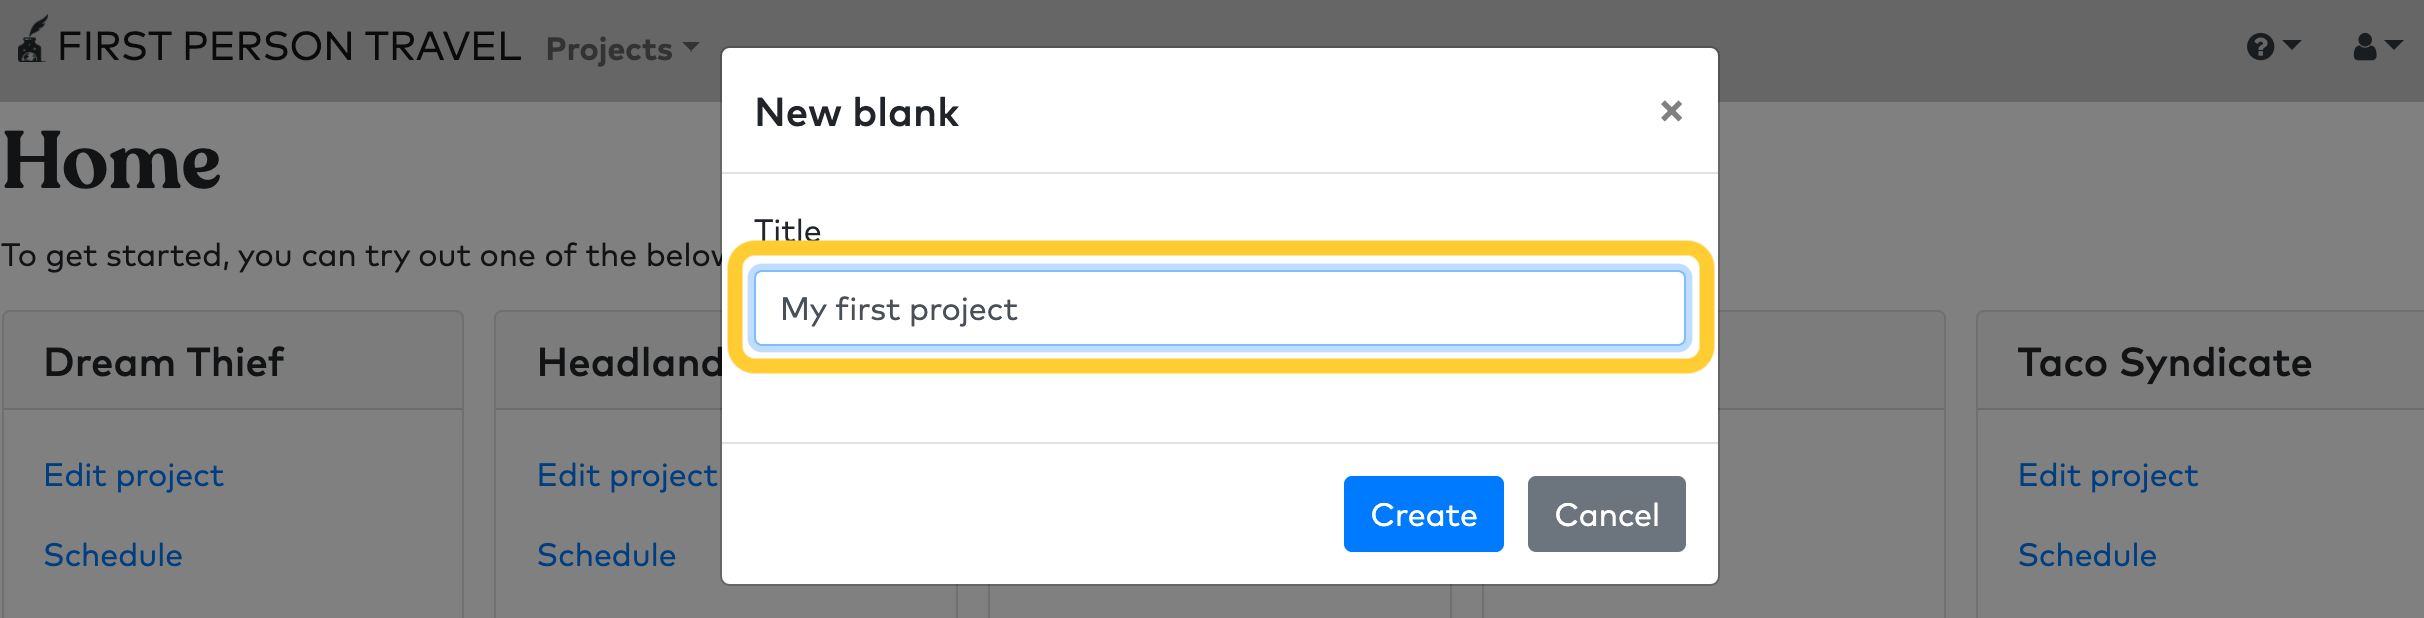
You now have a new project!
2. Create a role for our character
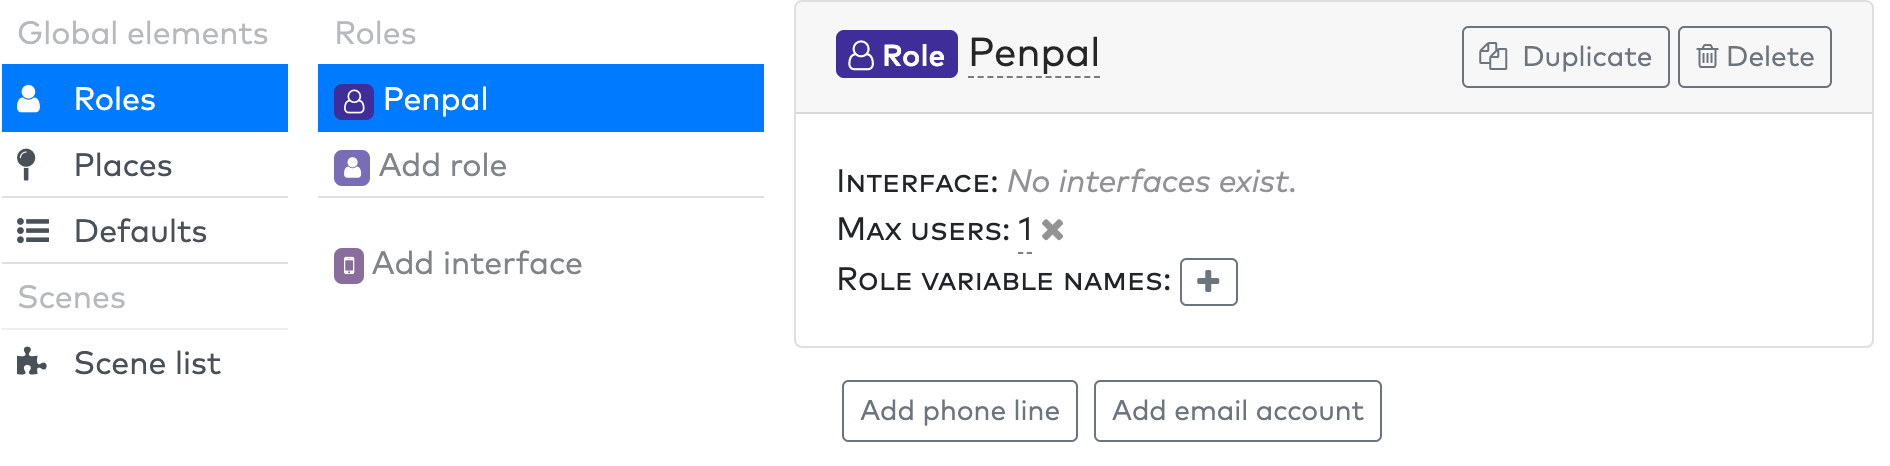
First off, let's make a role for the character our player is going to talk to. We'll name them "Penpal". The role won't be backed by a real person; instead it will respond in scripted ways to messages from the player.
Navigate to Roles > Add role.
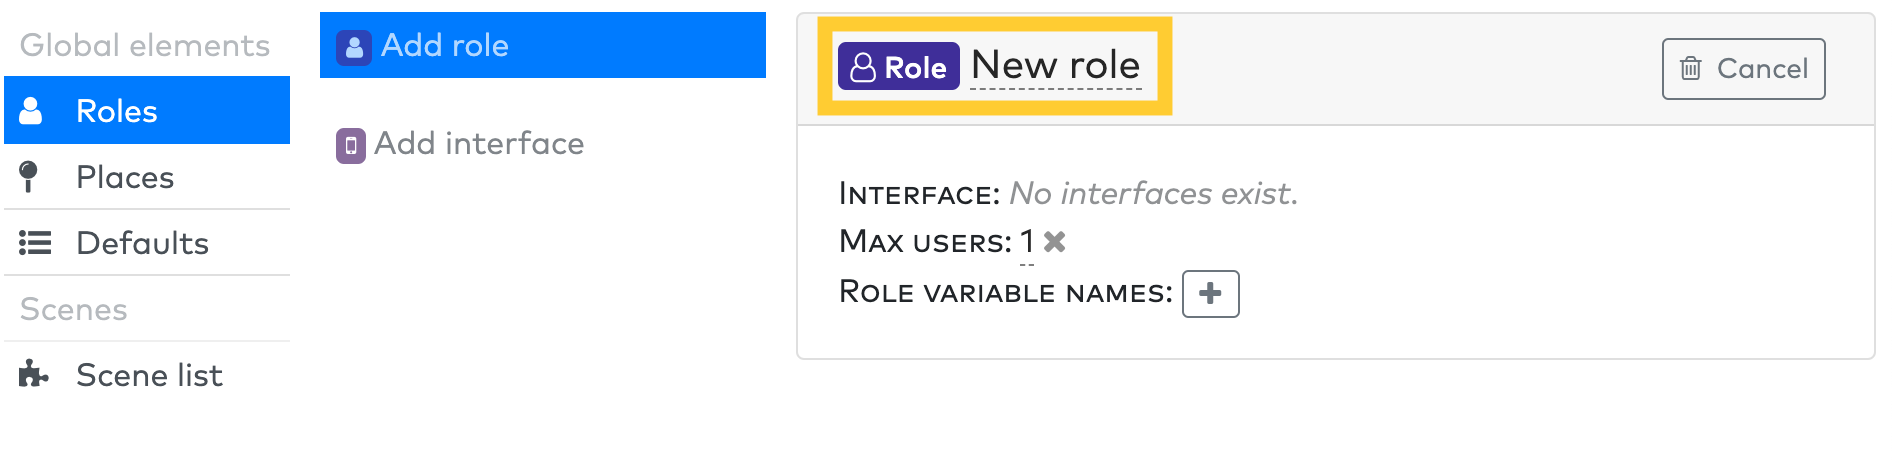
Click the default "New role" title to change the title of this role to "Penpal".
3. Create a role for our player
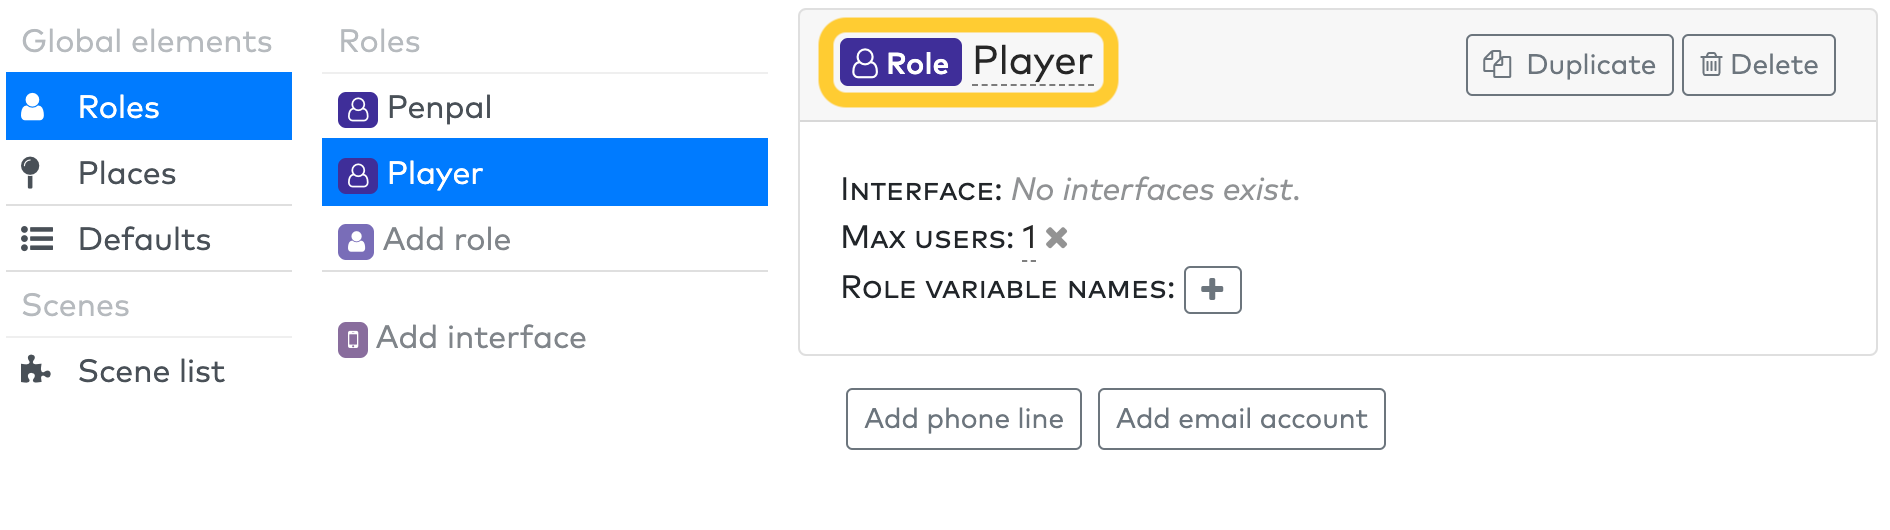
Now let's add a second role for our player. This role will be played by our actual audience.
Navigate to Roles > Add role again, and set the title of this new role to "Player".
4. Create a phone line for the player
We'll add a phone line for our player role, which will let the user playing this role receive messages from the character via text message, and respond via text message as well.
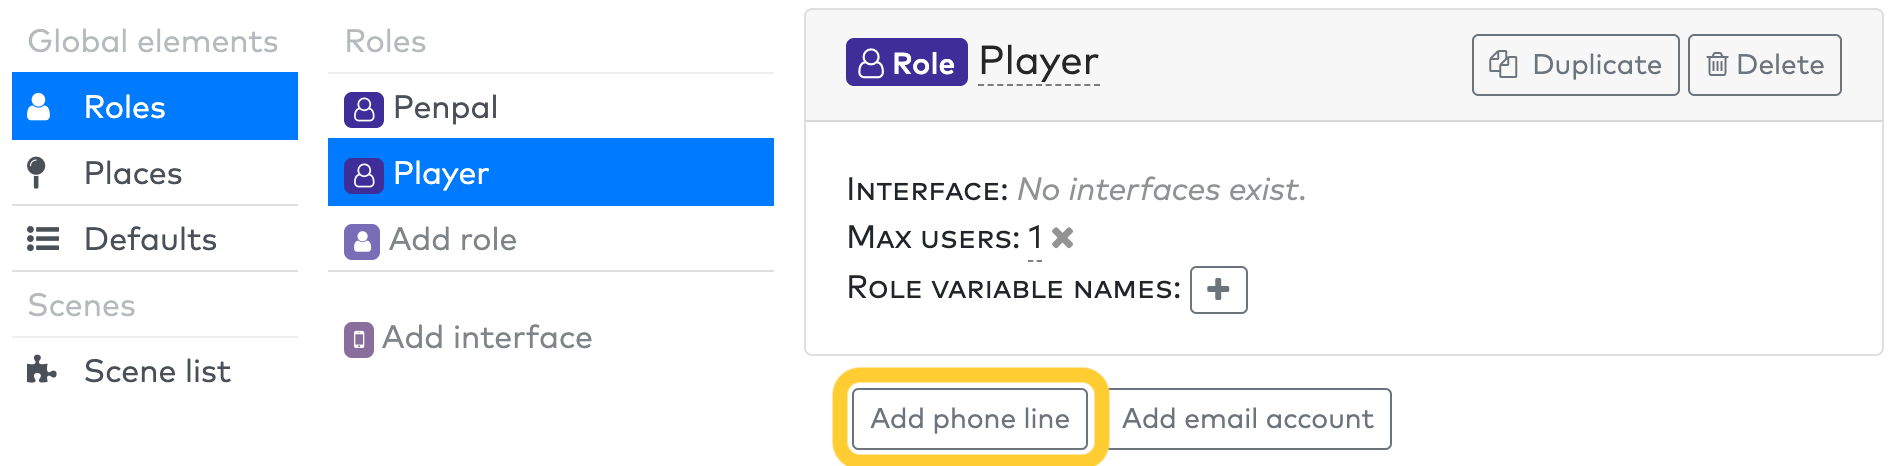
Click Add phone line under the Player role.
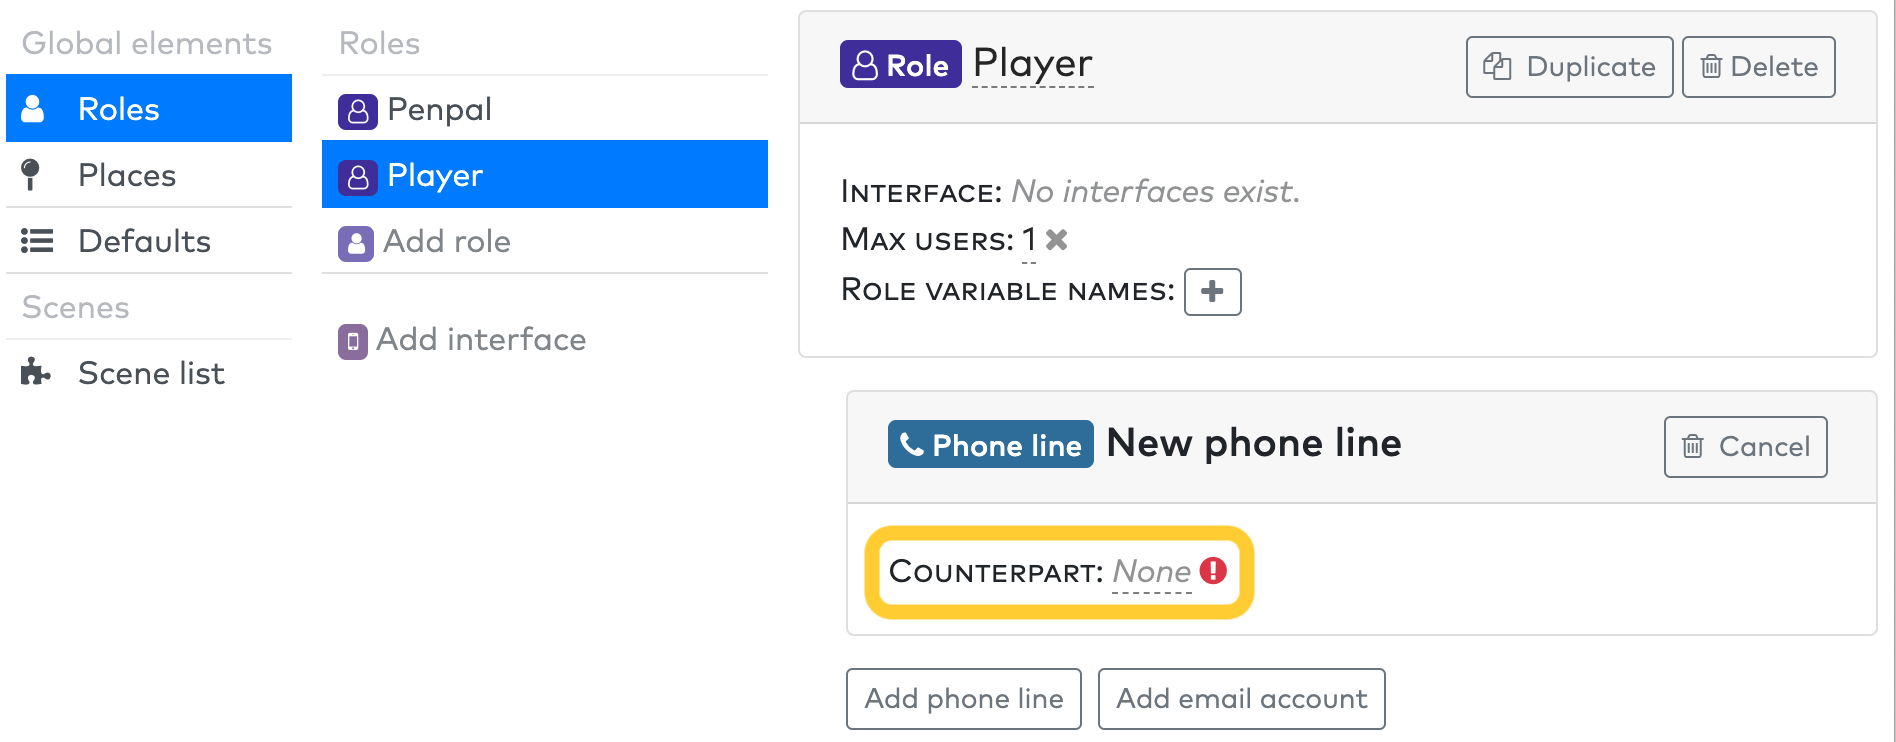
Set the Counterpart of your new role to "Penpal". This means that the user playing the "Player" role will receive any messages from the "Penpal" role as a text message.
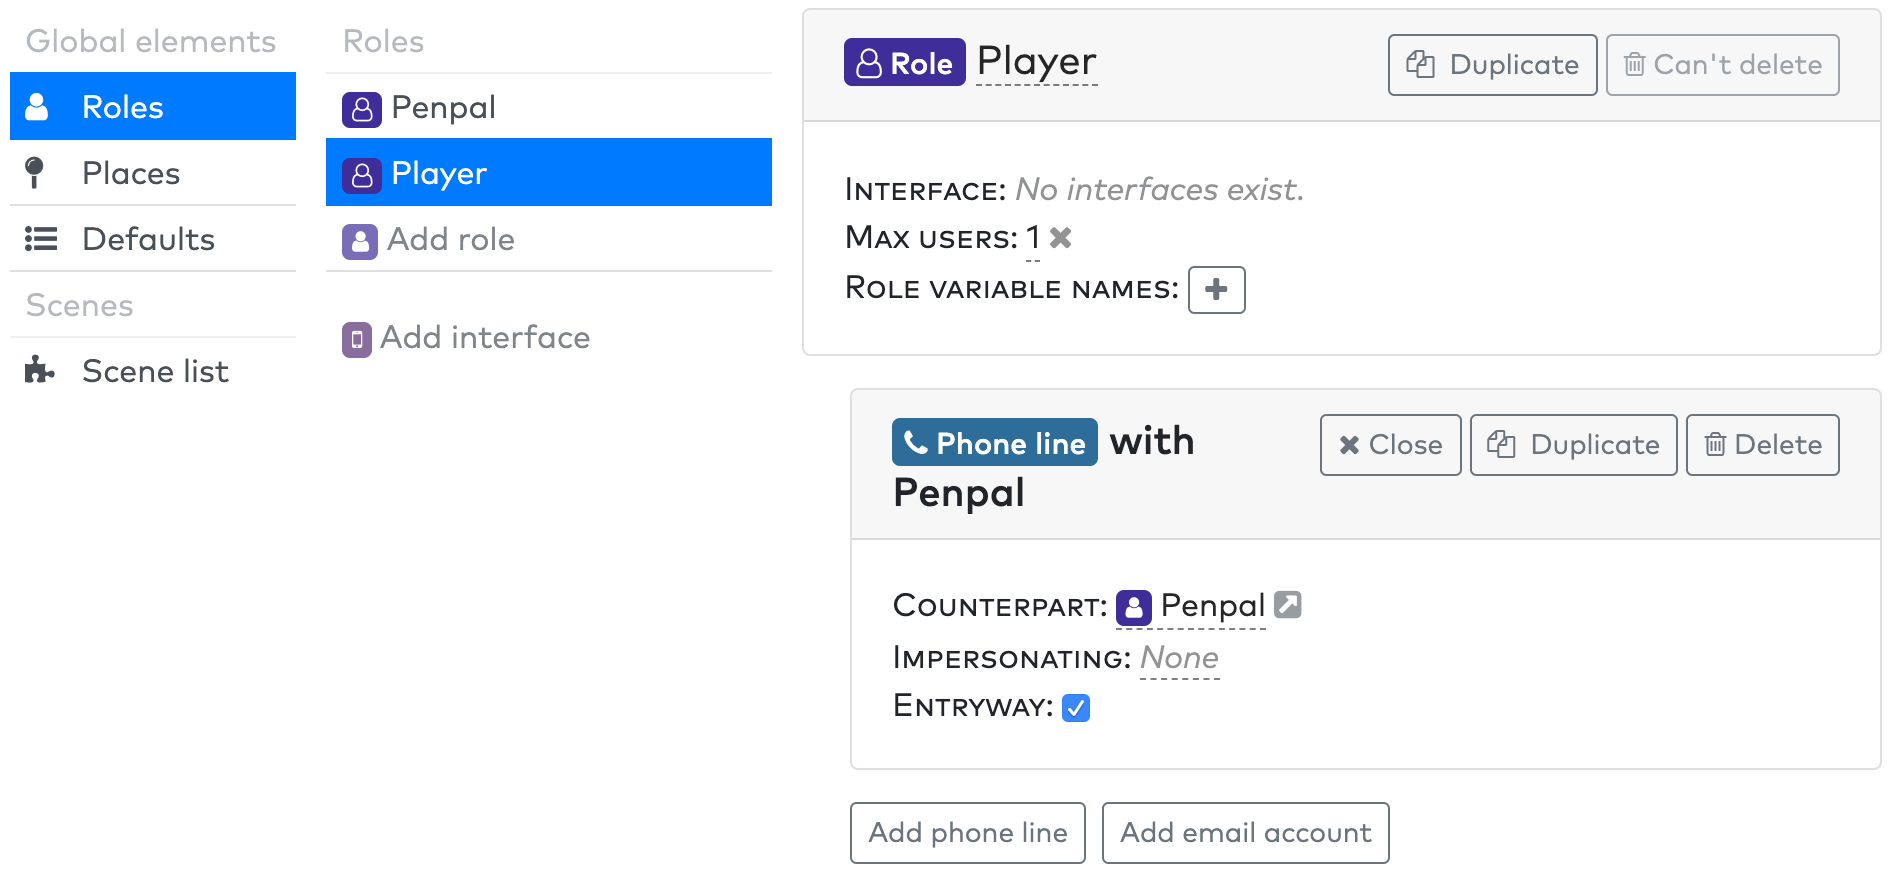
Once you've selected a counterpart, the remaining optional fields appear. Click the Entryway checkbox to make this phone line an entryway.
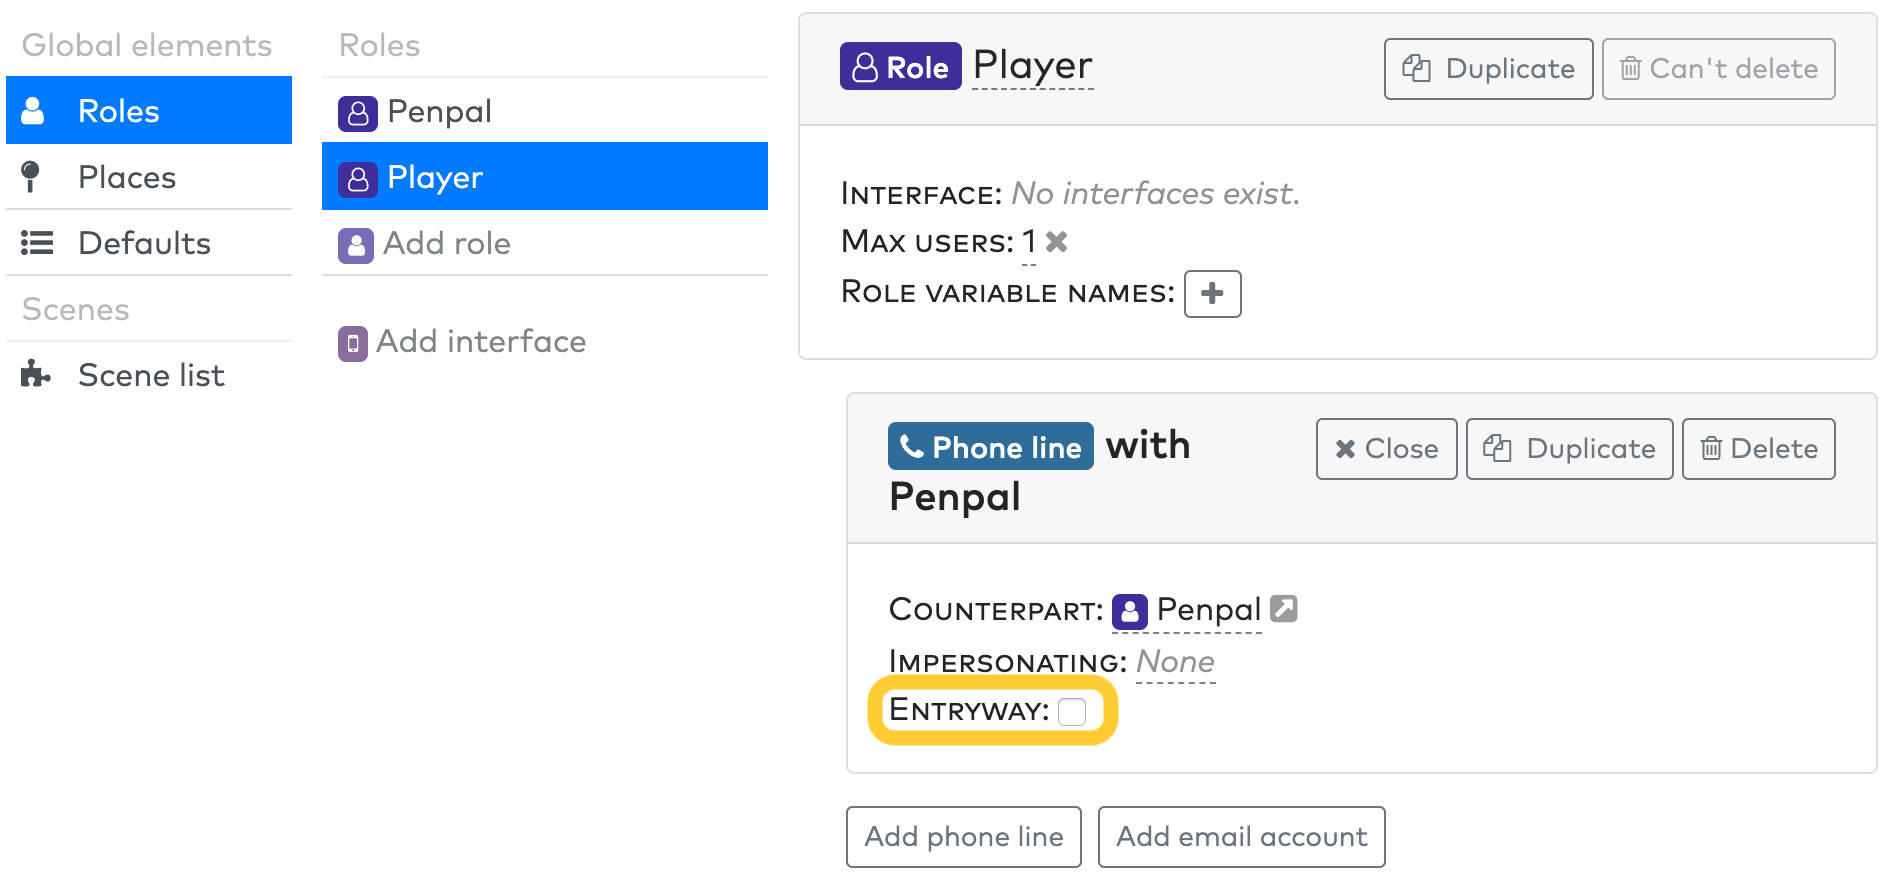
Making a phone line an entryway means that new participants can text that number, and if they aren't already participating in a run of your project, a new run will be created for them. Entryway phone lines also have dedicated phone numbers that are only for your experience, so you could share that number on a website or business card. Non-entry phone lines have numbers allocated dynamically, so they may not always be the same.
5. Assign a phone number
We can now allocate a unique phone number just for your own experience. Click on Schedule in the top nav bar, and then click Allocate phone numbers to assign a phone number to your line.
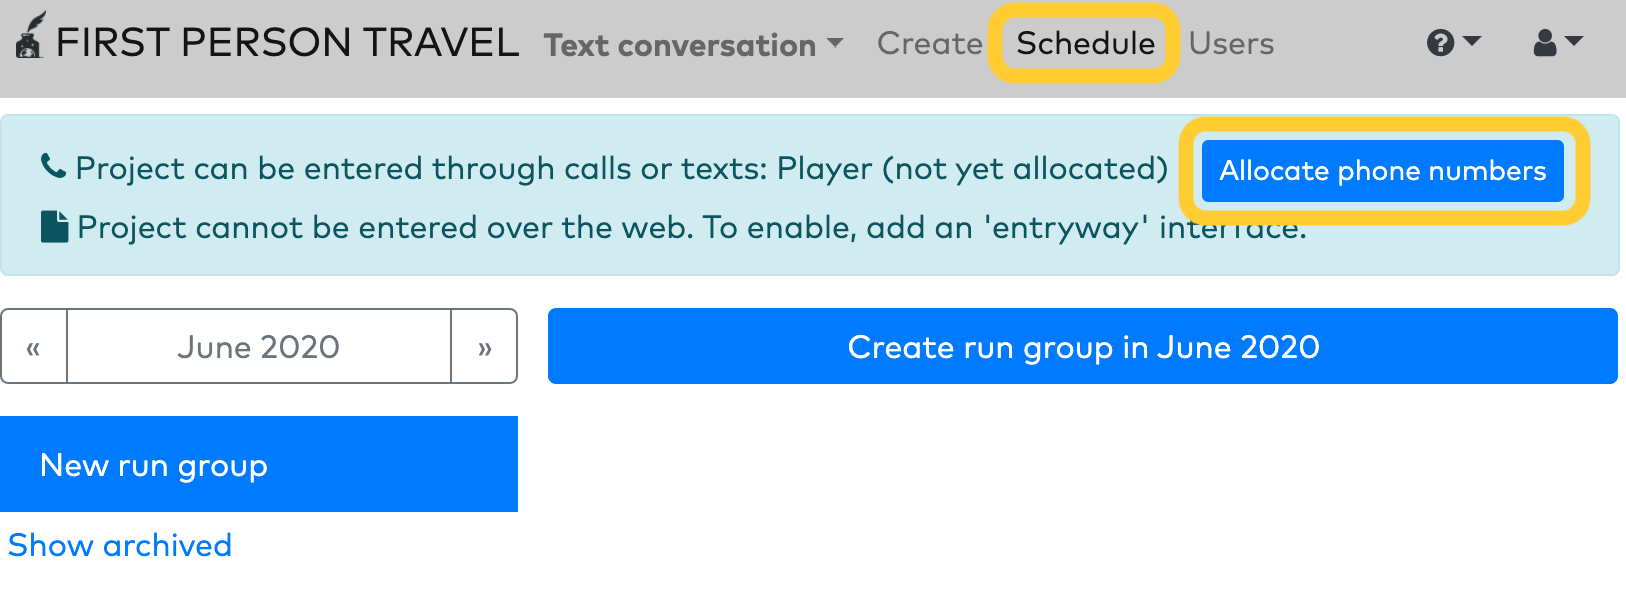
You now have a phone number just for your experience!
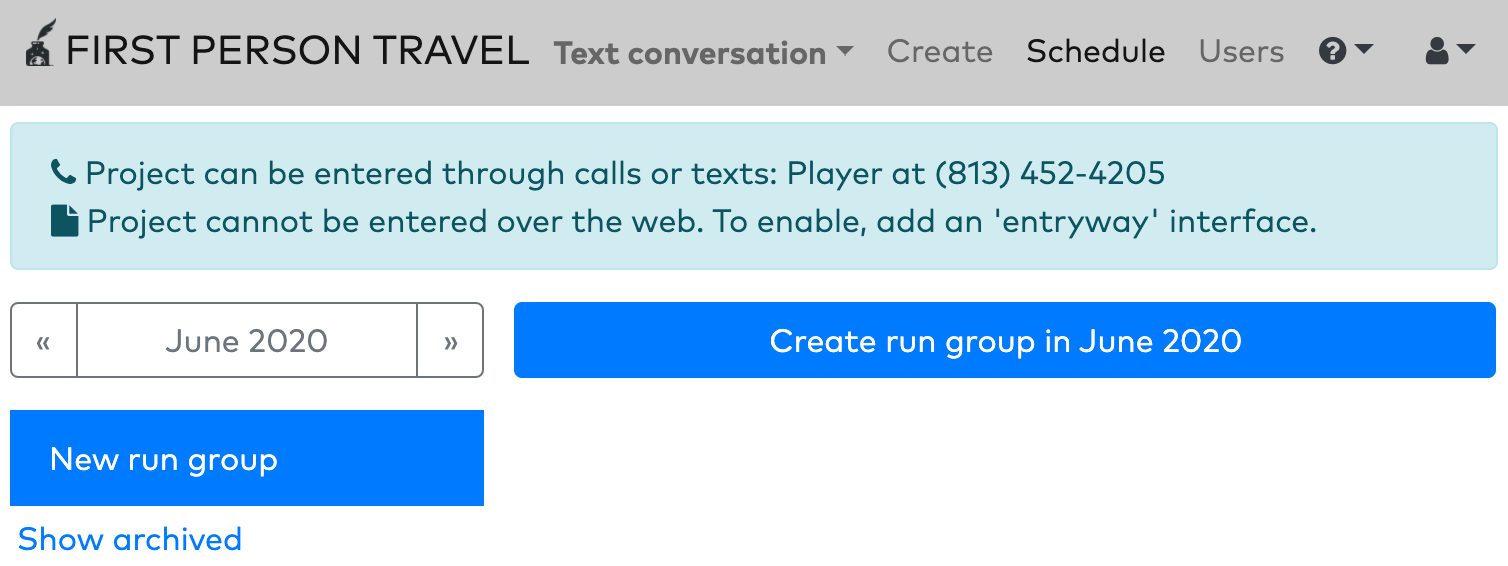
If you text that number right now, a new run of your project will be created, but nothing will happen because you haven't created any behaviors. Let's change that!
6. Respond to incoming texts
First, let's make our first scene. Navigate to Scene list > Add scene and choose a name.

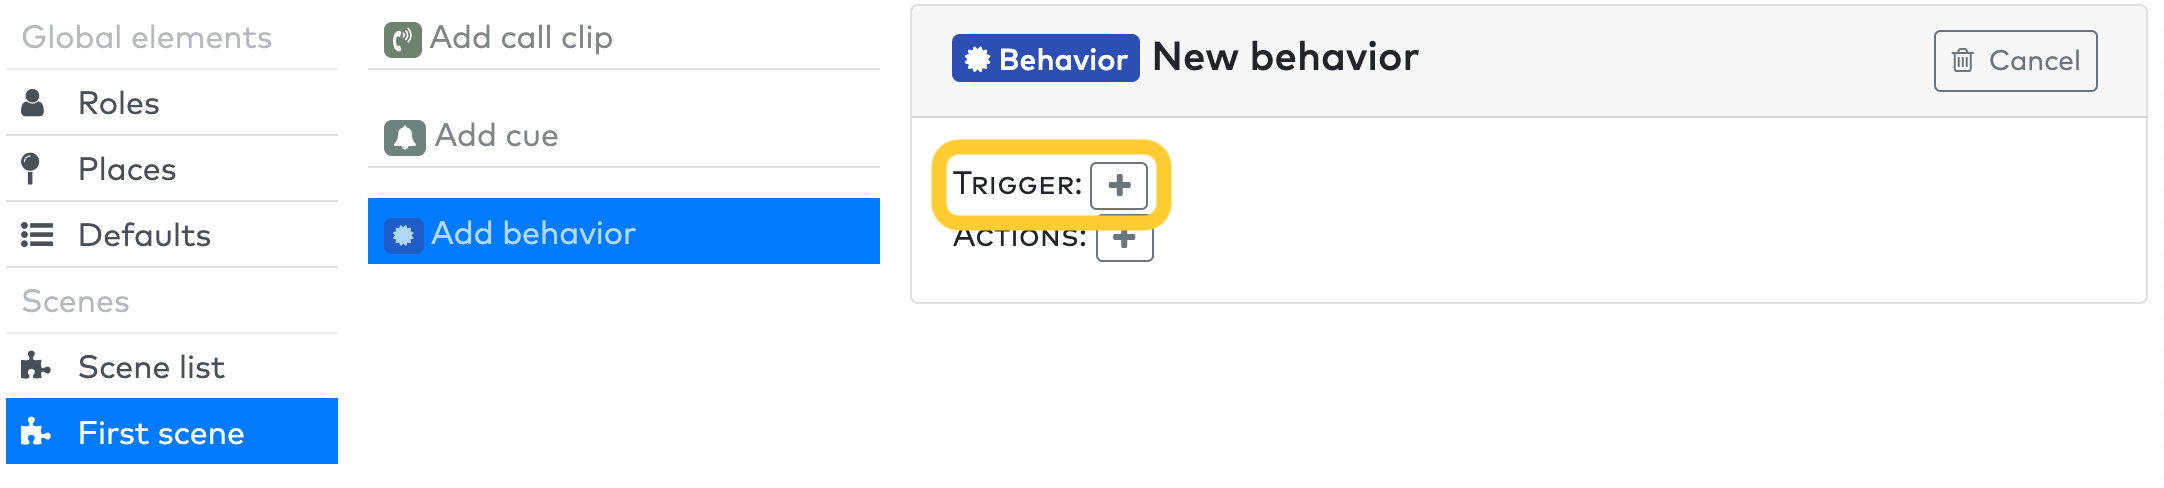
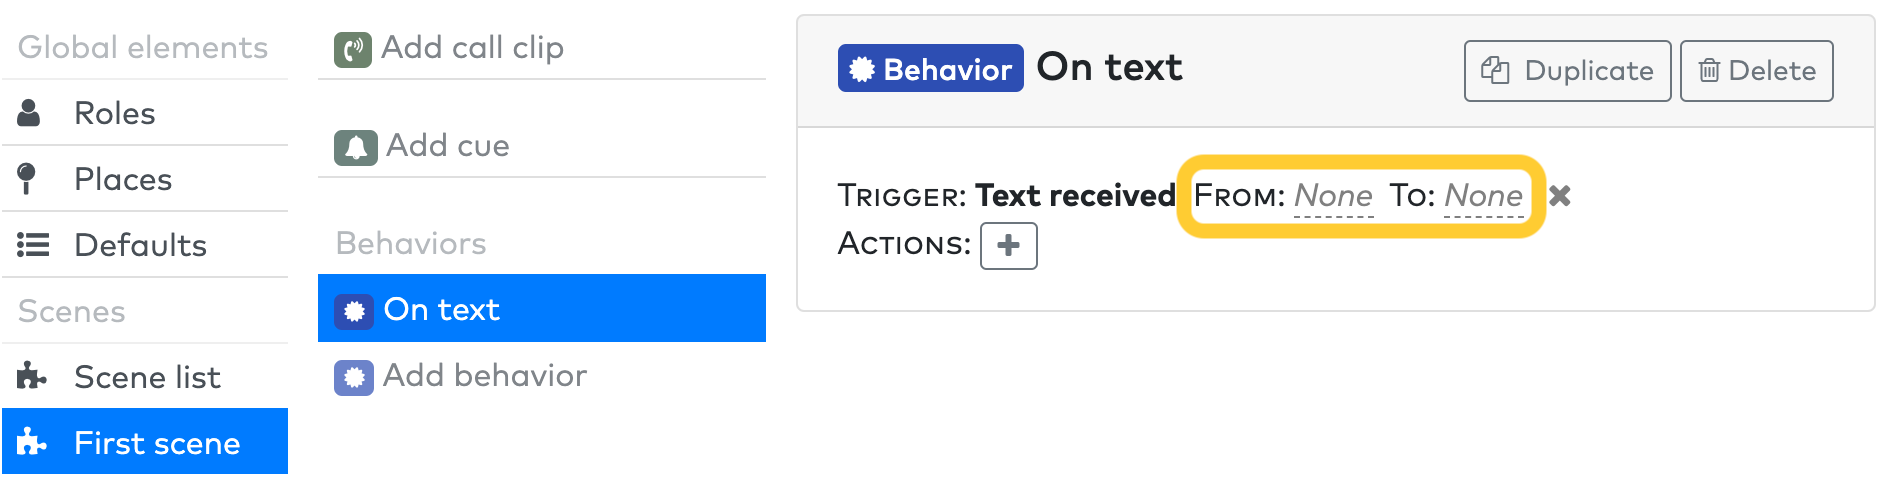
Now that we have a scene, let's navigate to that scene in the Scenes menu, and click Add behavior. Behaviors are how all activity occurs inside a Charter experience. Every behavior has a Trigger, which defines the circumstances under which the behavior will activate, and a list of Actions, which define what happens once the behavior activates. Click on the Trigger add button to set this behavior's triggering conditions.
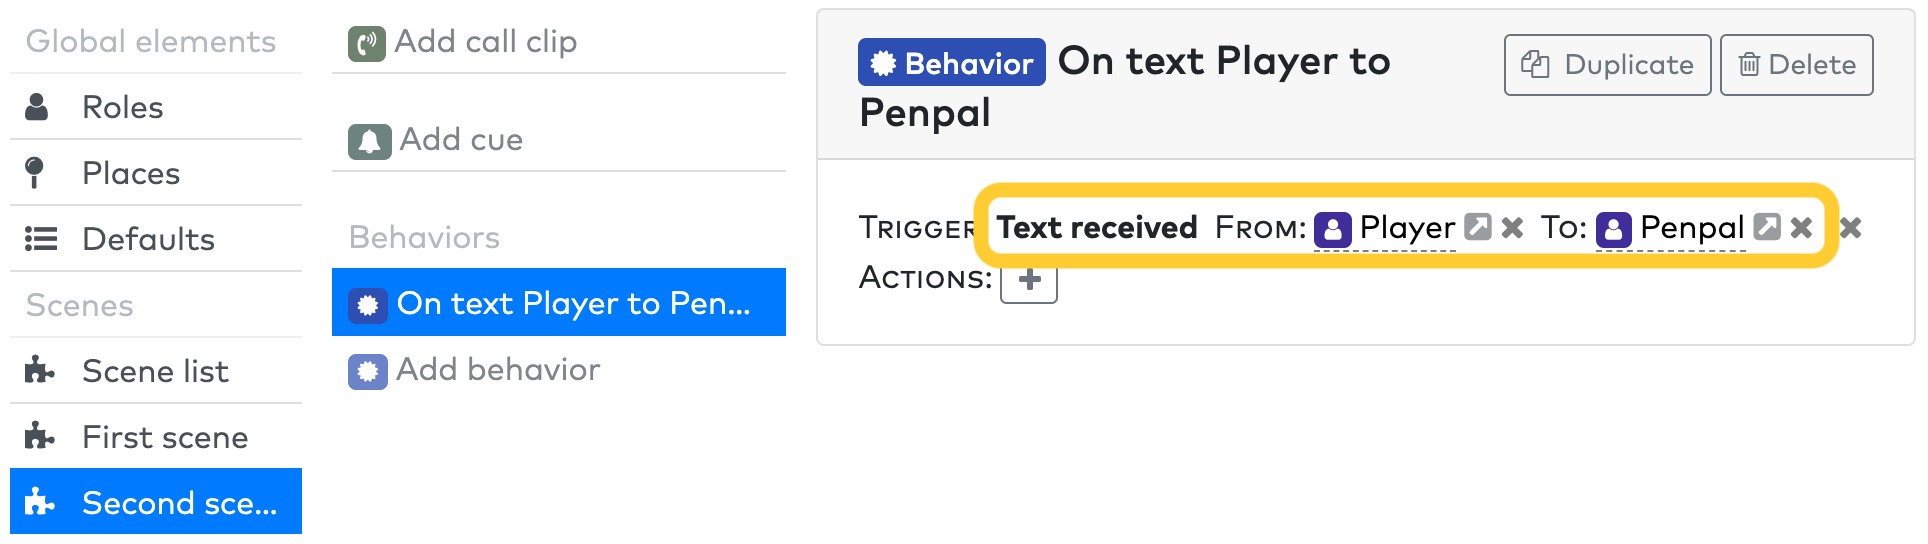
Select "Text received" from the dropdown box, and click on the check to confirm.
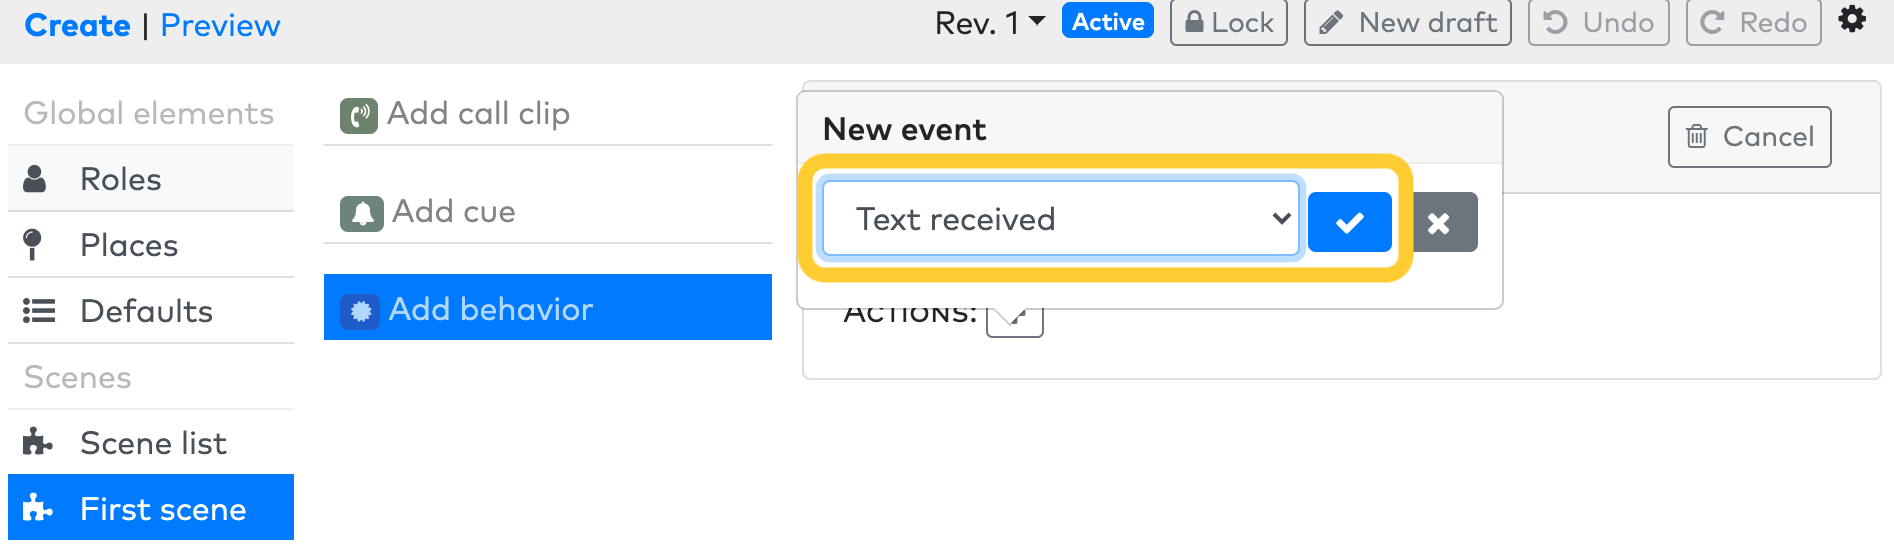
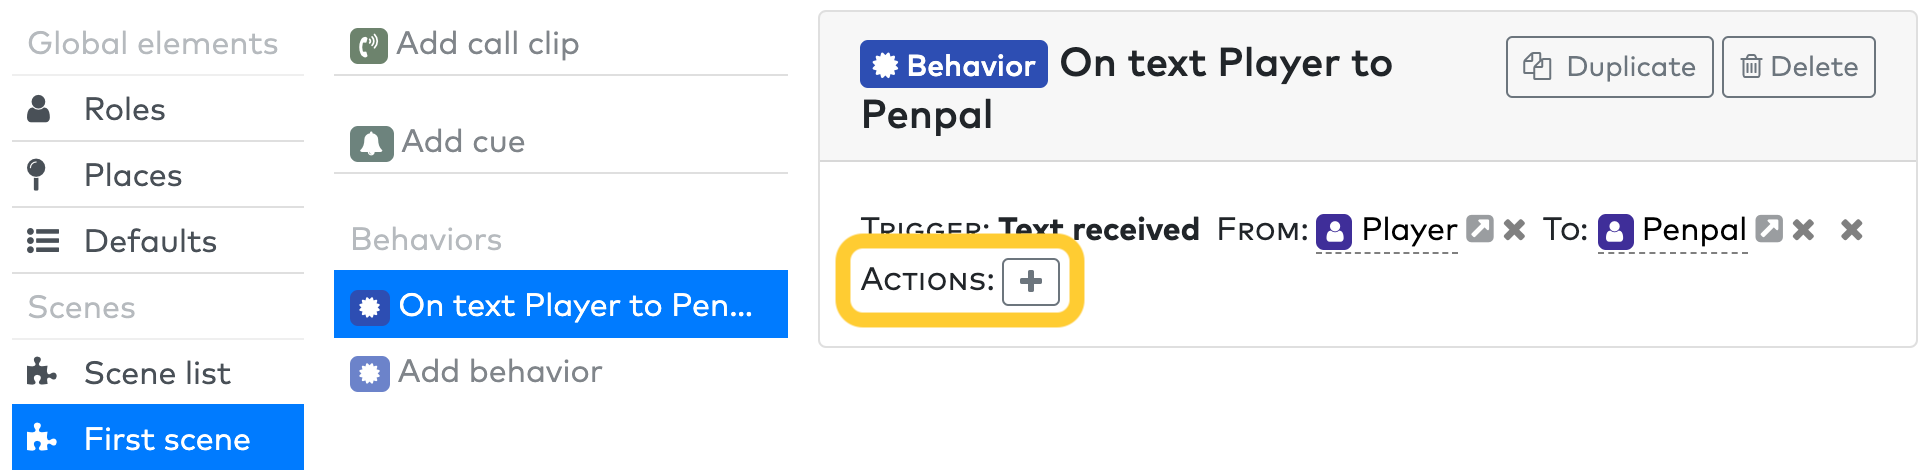
Select "Player" for the From field and "Penpal" for the To field. This means that this behavior will activate when the user playing the "Player" sends a text message to the "Penpal" role.
Now let's add an action! Click the Actions add button.
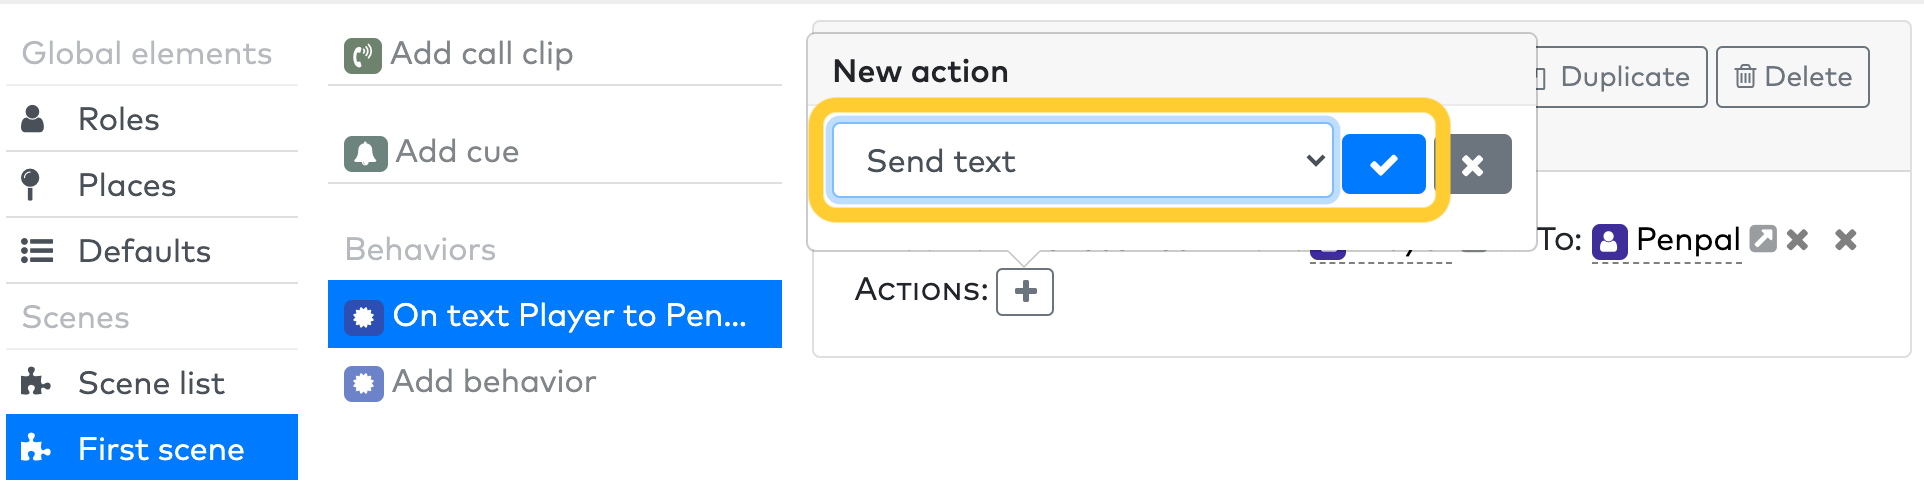
Select "Send text" as the action type, and click the check button.
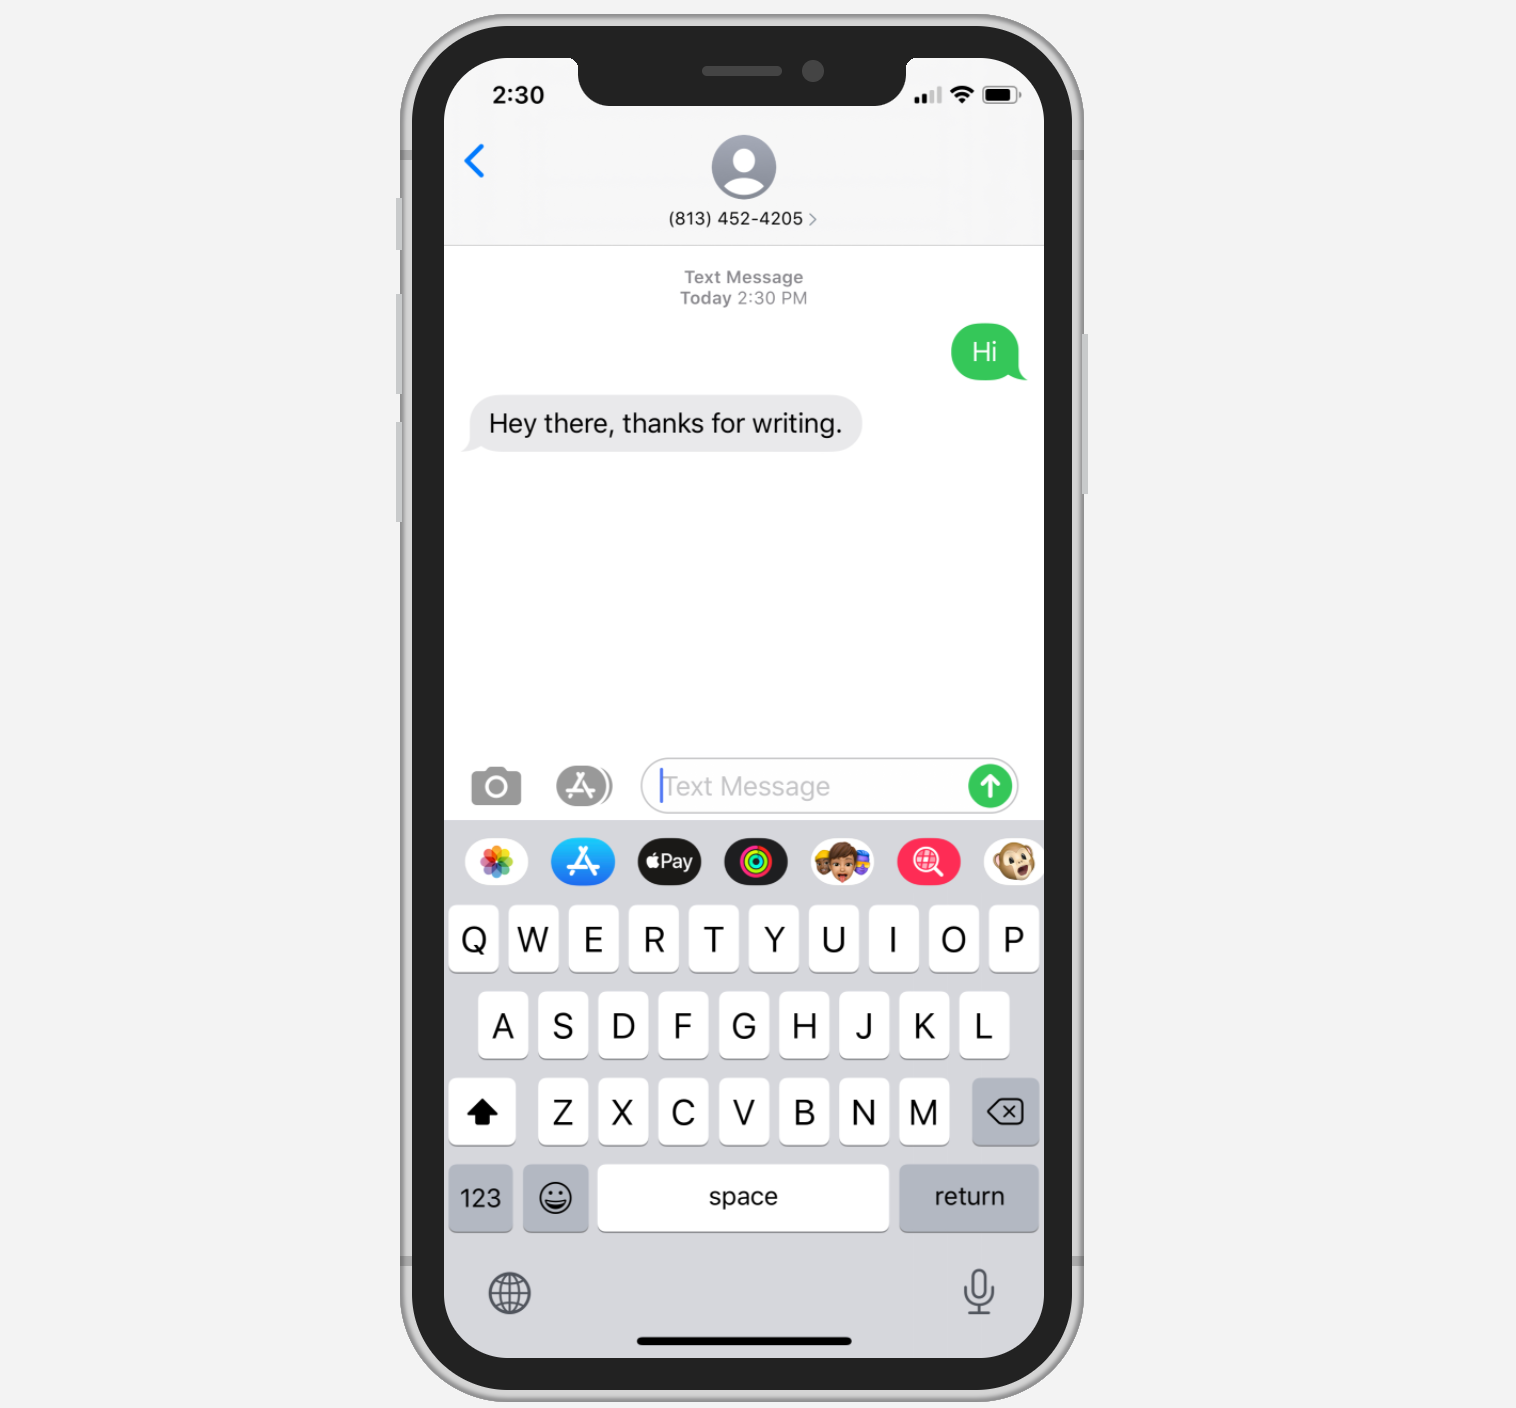
Select "Penpal" for the From field, "Player" for the To field, and the text "Hey there, thanks for writing." for the Content field.
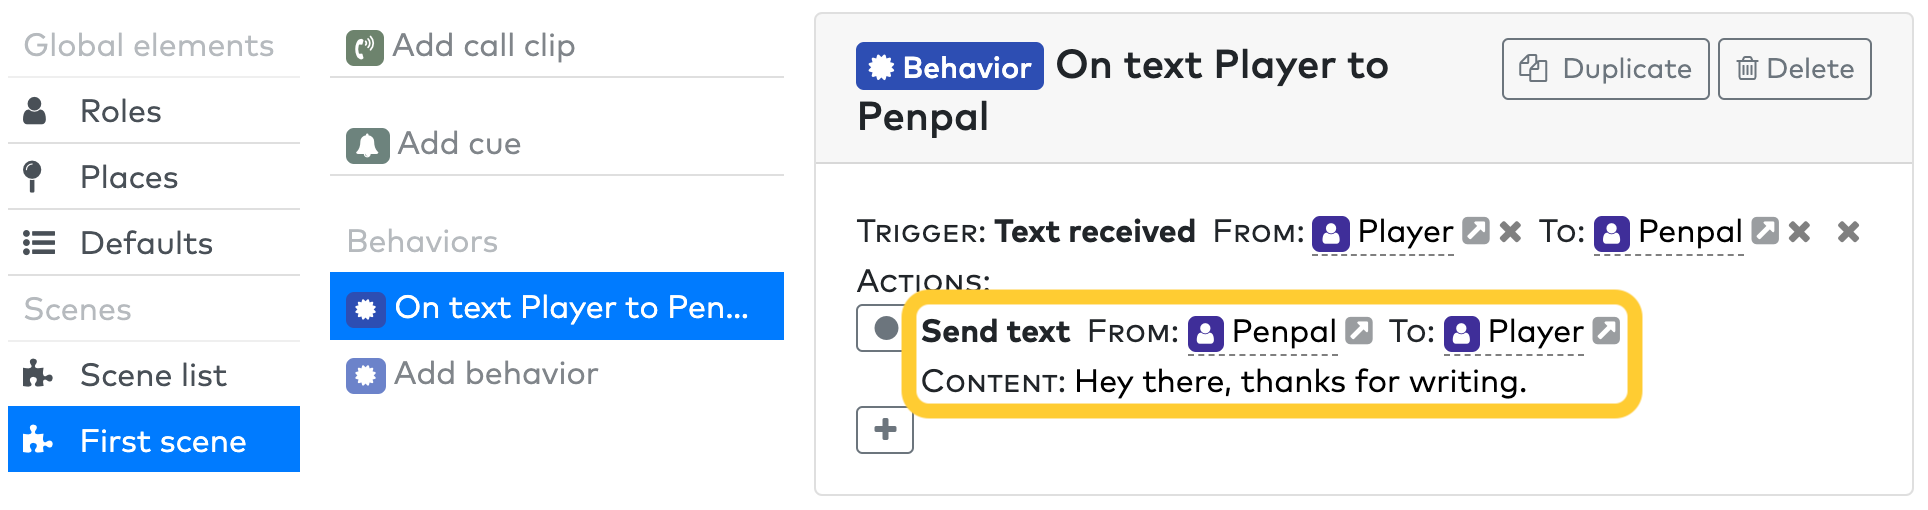
You now have a fully functional behavior. Now, if you send a text message to the number visible at the top of the "Schedule" tab in your project, you should get a response back saying "Hey there, thanks for writing". Try it out!
7. Add a time delay
Let's add a new message after a time delay. Add two new actions:
- A "Wait" action with a duration of "5s" (five seconds).
- A "Send text" action from "Penpal" to "Player" with the Content "What's your favorite color?"
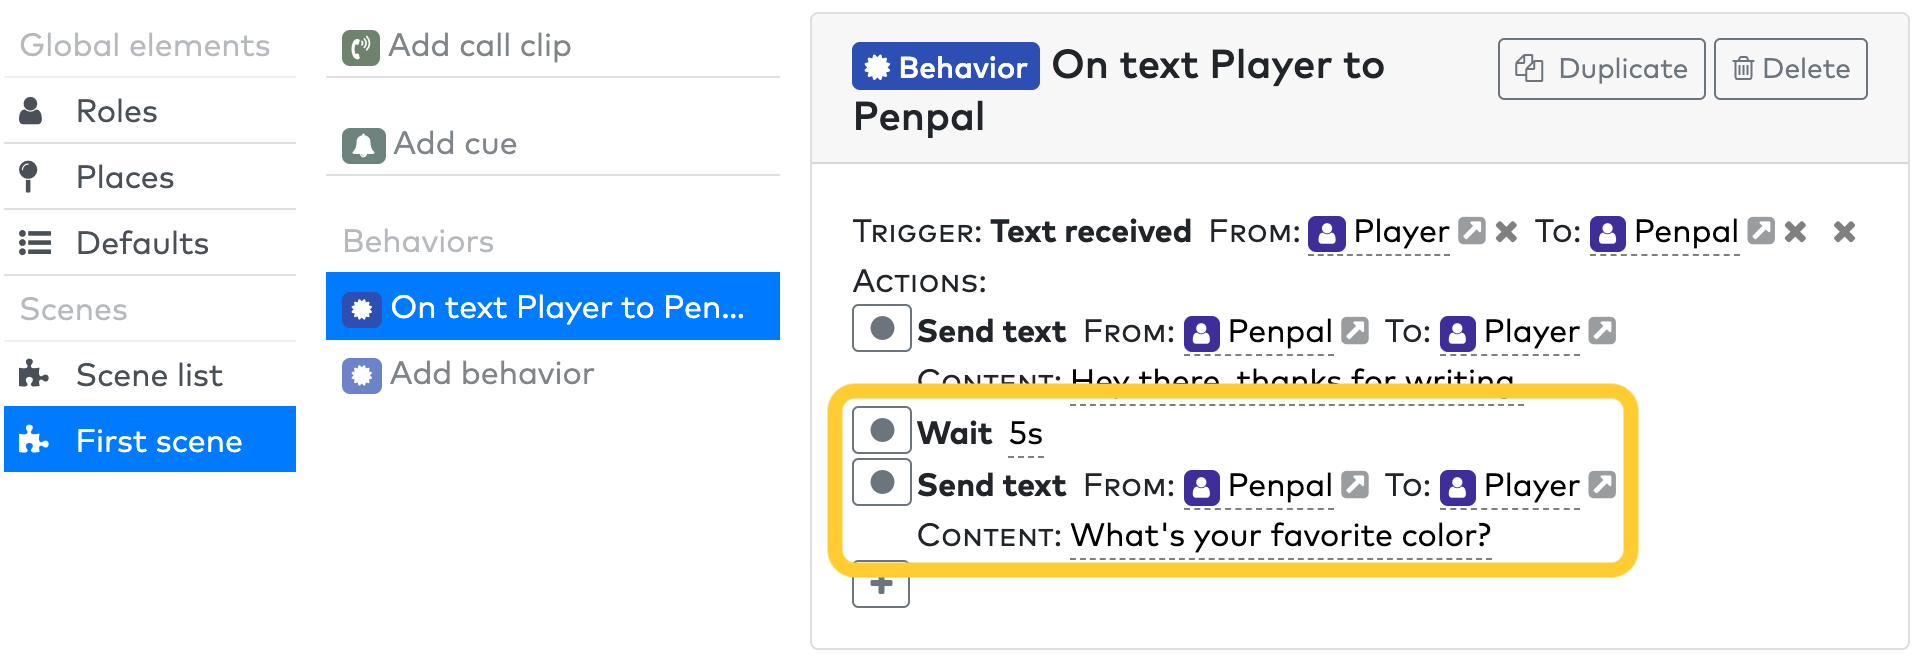
You can use "Wait" actions to add time delays, large and small, between your actions.
8. Add a conditional response
Let's add a conditional response that depends on the message received from the player.
The simplest way to know that we've already asked the question about favorite color, and therefore that we are waiting for an answer to that question, is to add a new Scene, and start that scene. Let's do that.
Navigate to Scene list > Add scene, and set the title of your new scene to "Second scene".
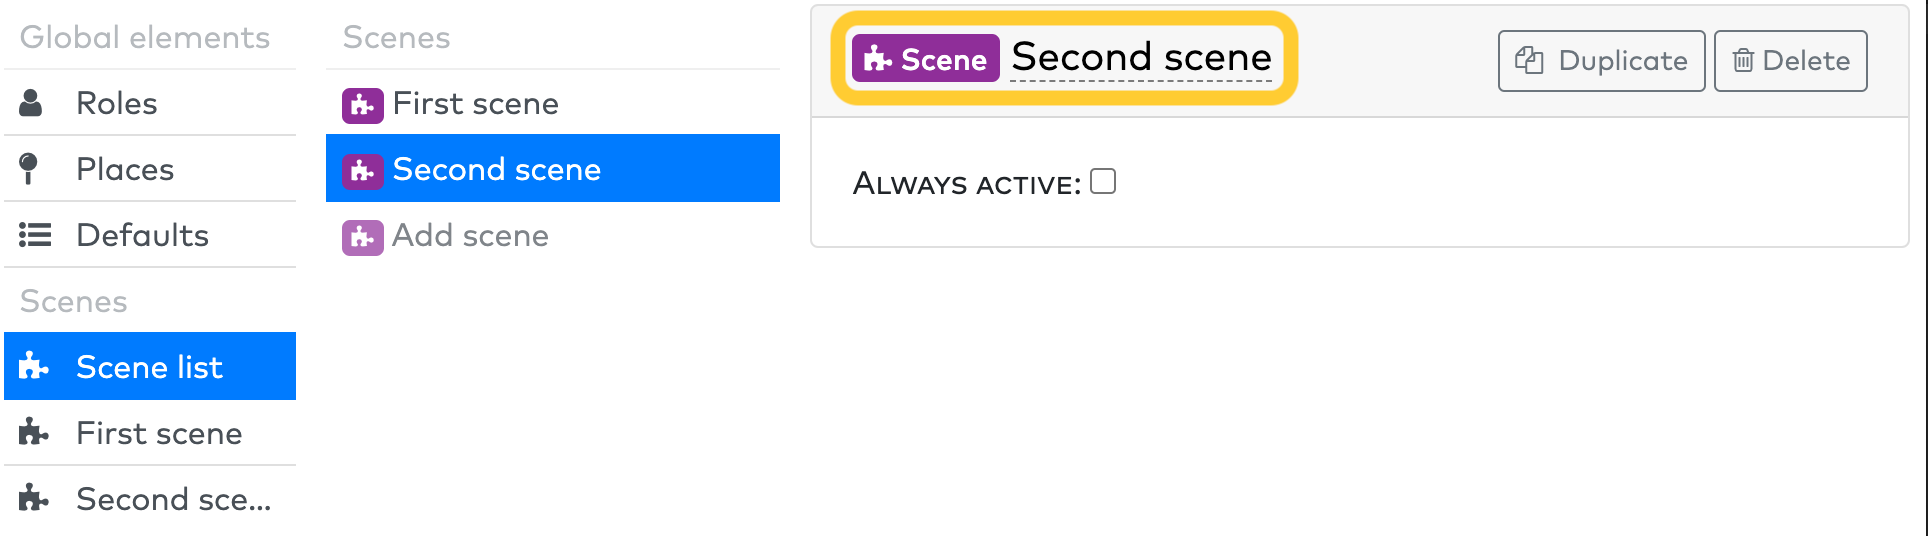
Scenes are sorted alphabetically, so if you have many scenes in your project, you'll probably want to add a numerical ordering at the start of each of their names.
Now we'll want to start this second scene after sending the color question. Navigate to First scene and select your On text behavior. Add a new action with the "Start scene" type, and select "Second scene" as the scene to start.
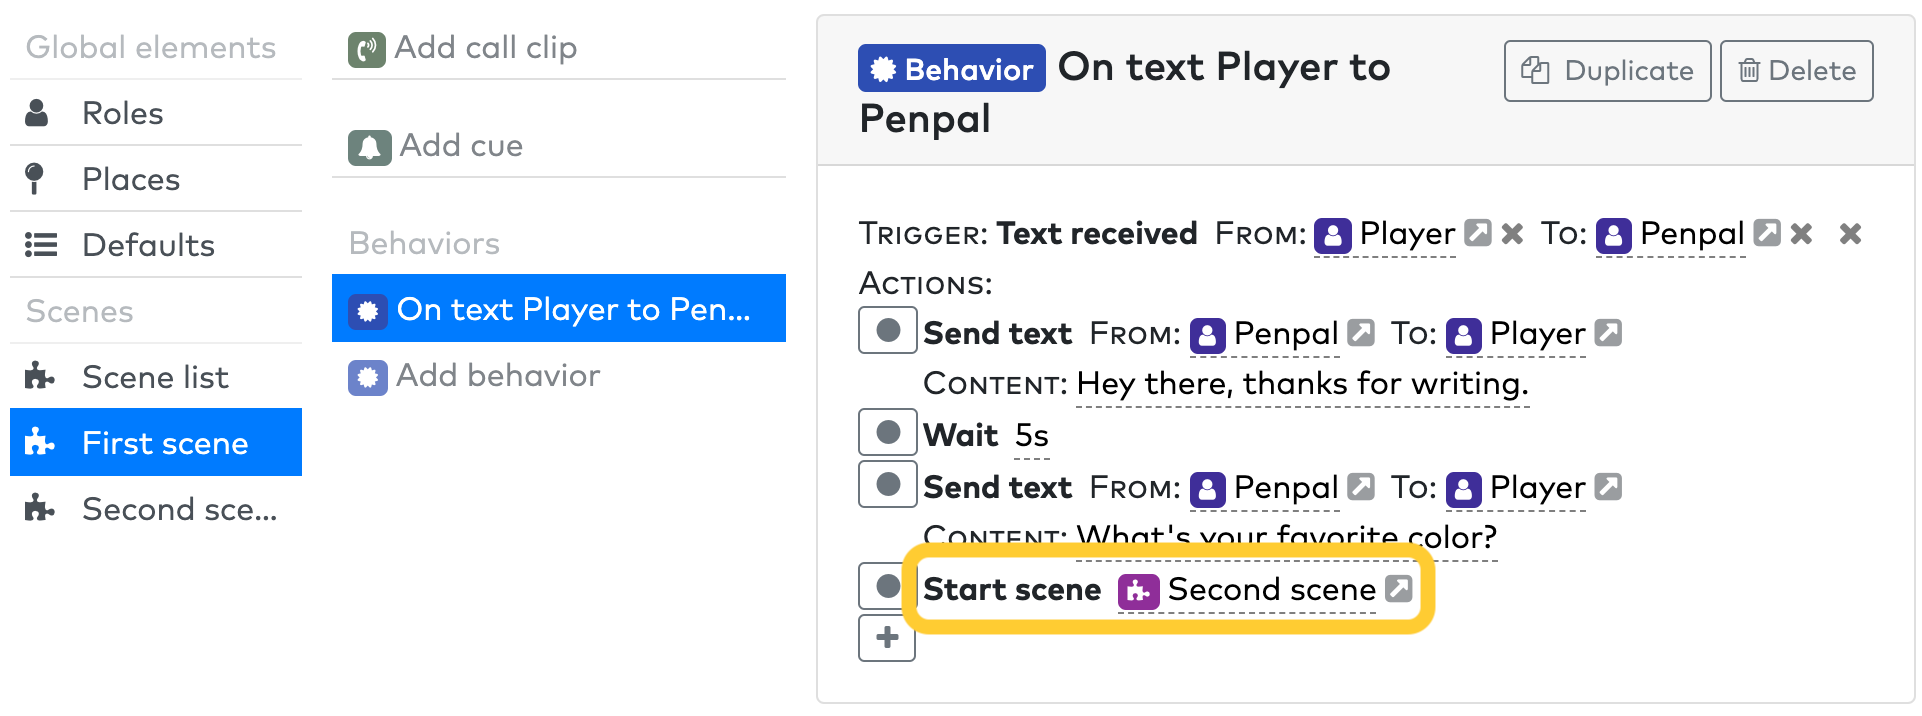
Now, after having asked what color is the player's favorite, the second scene will start, where we can respond to this query.
Navigate to Scene list > Second scene and select Add behavior. Select "Text received" for the Trigger field, and From the "Player" role and To the "Penpal" role.
Now let's add some conditional logic. Add an action with the "Branch" type.
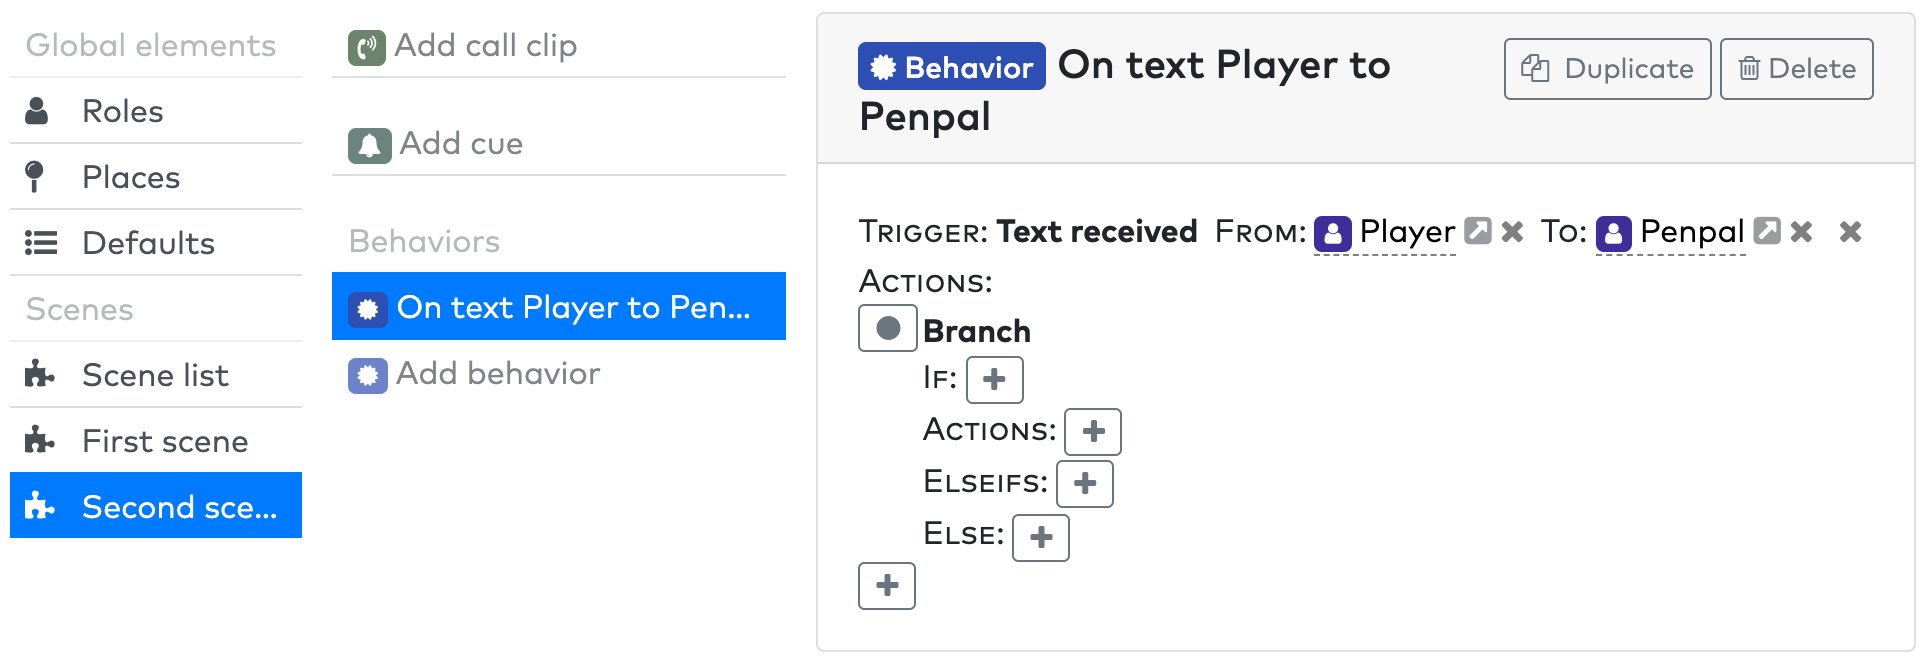
Branch actions do different things based on Conditions. The If field of this Branch is a Condition. There are many different kinds of conditions, used to evaluate the state of your experience.
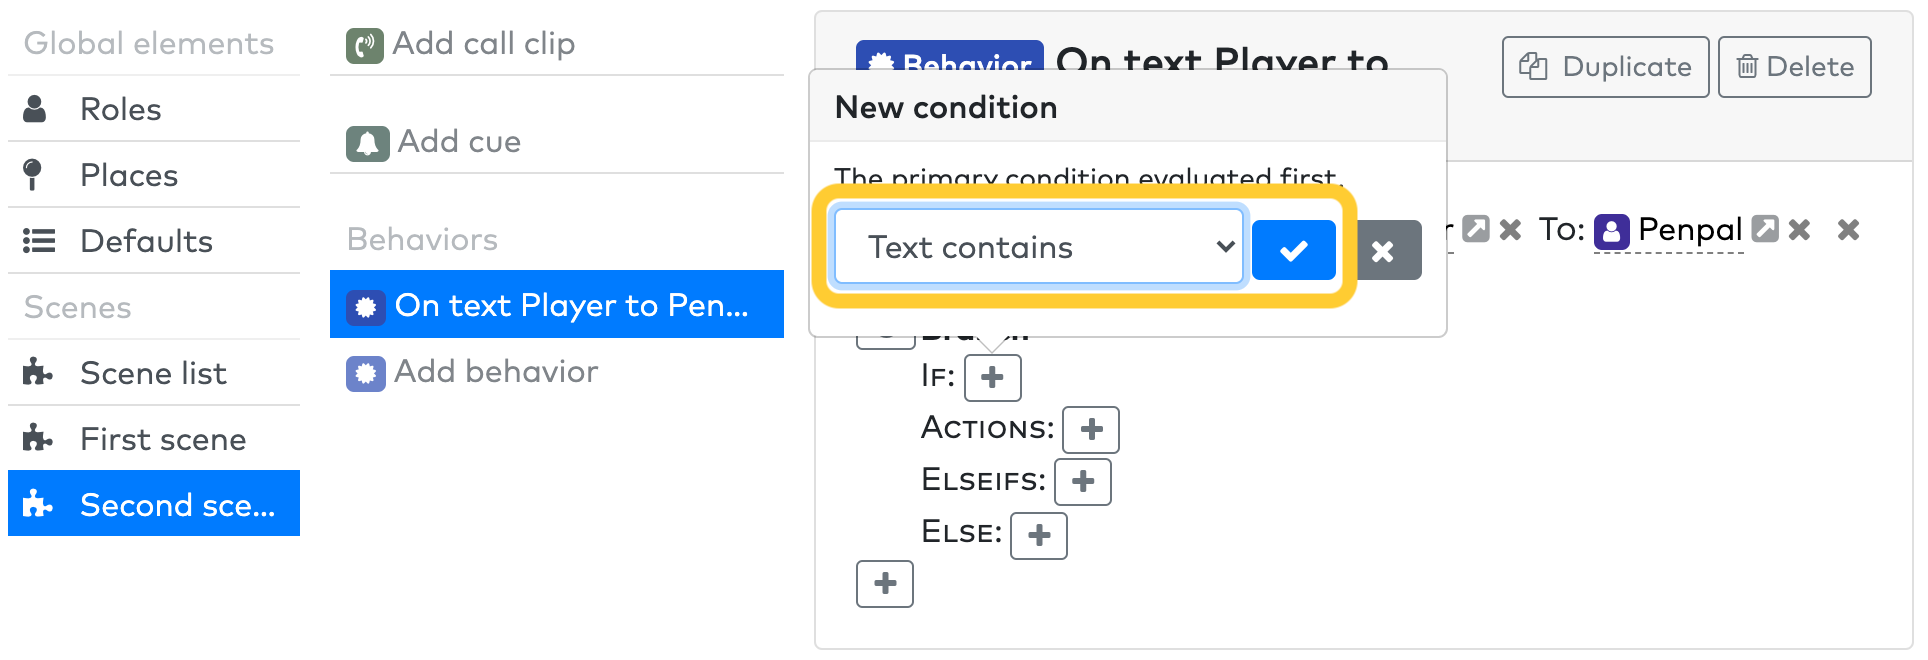
Click the Add If button, and select "Text contains" as the condition, then click the check button.
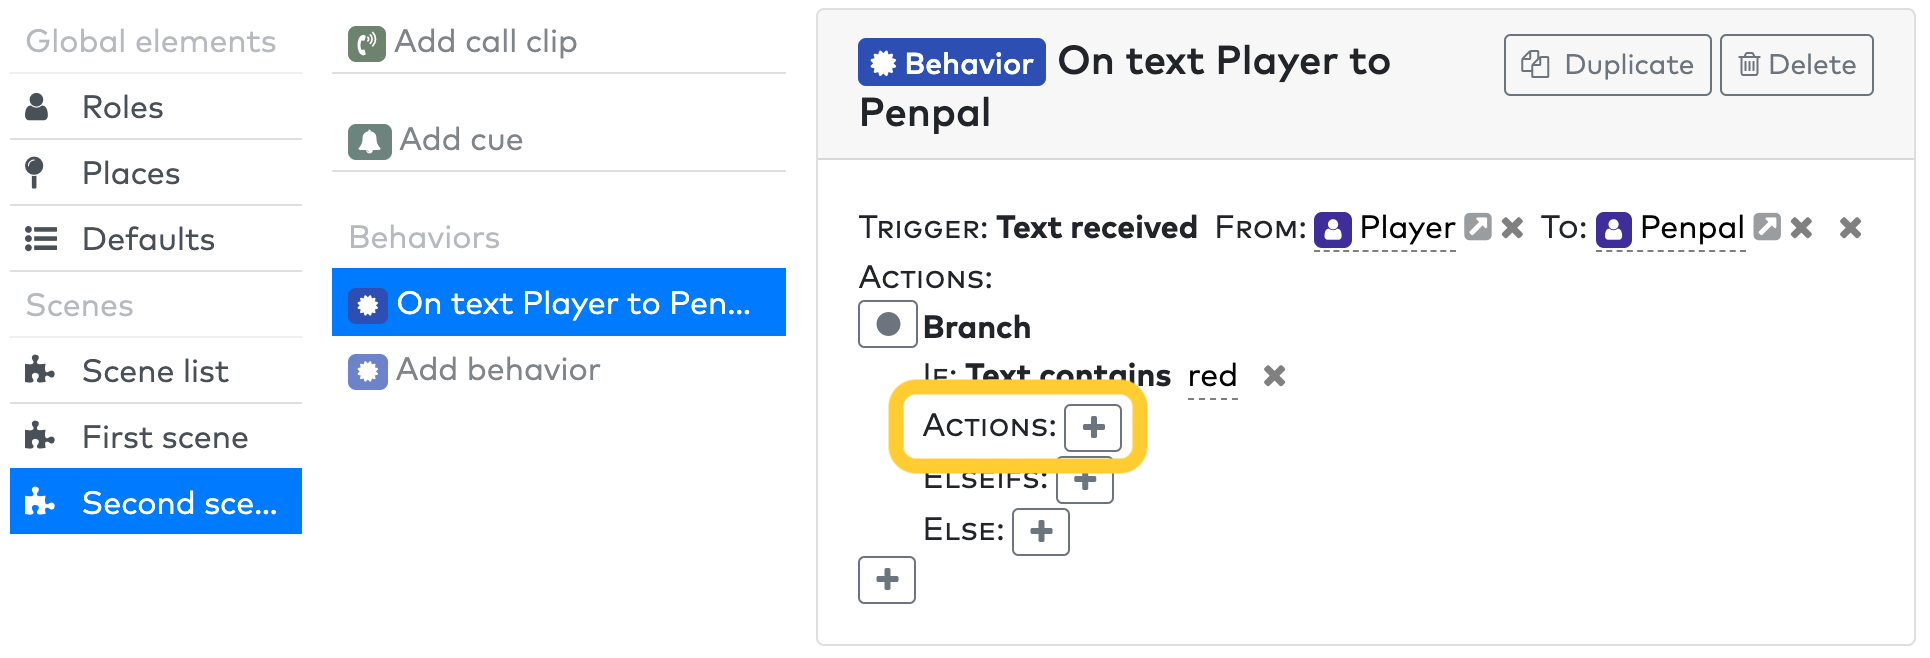
Set the field of the Text contains condition to "red".
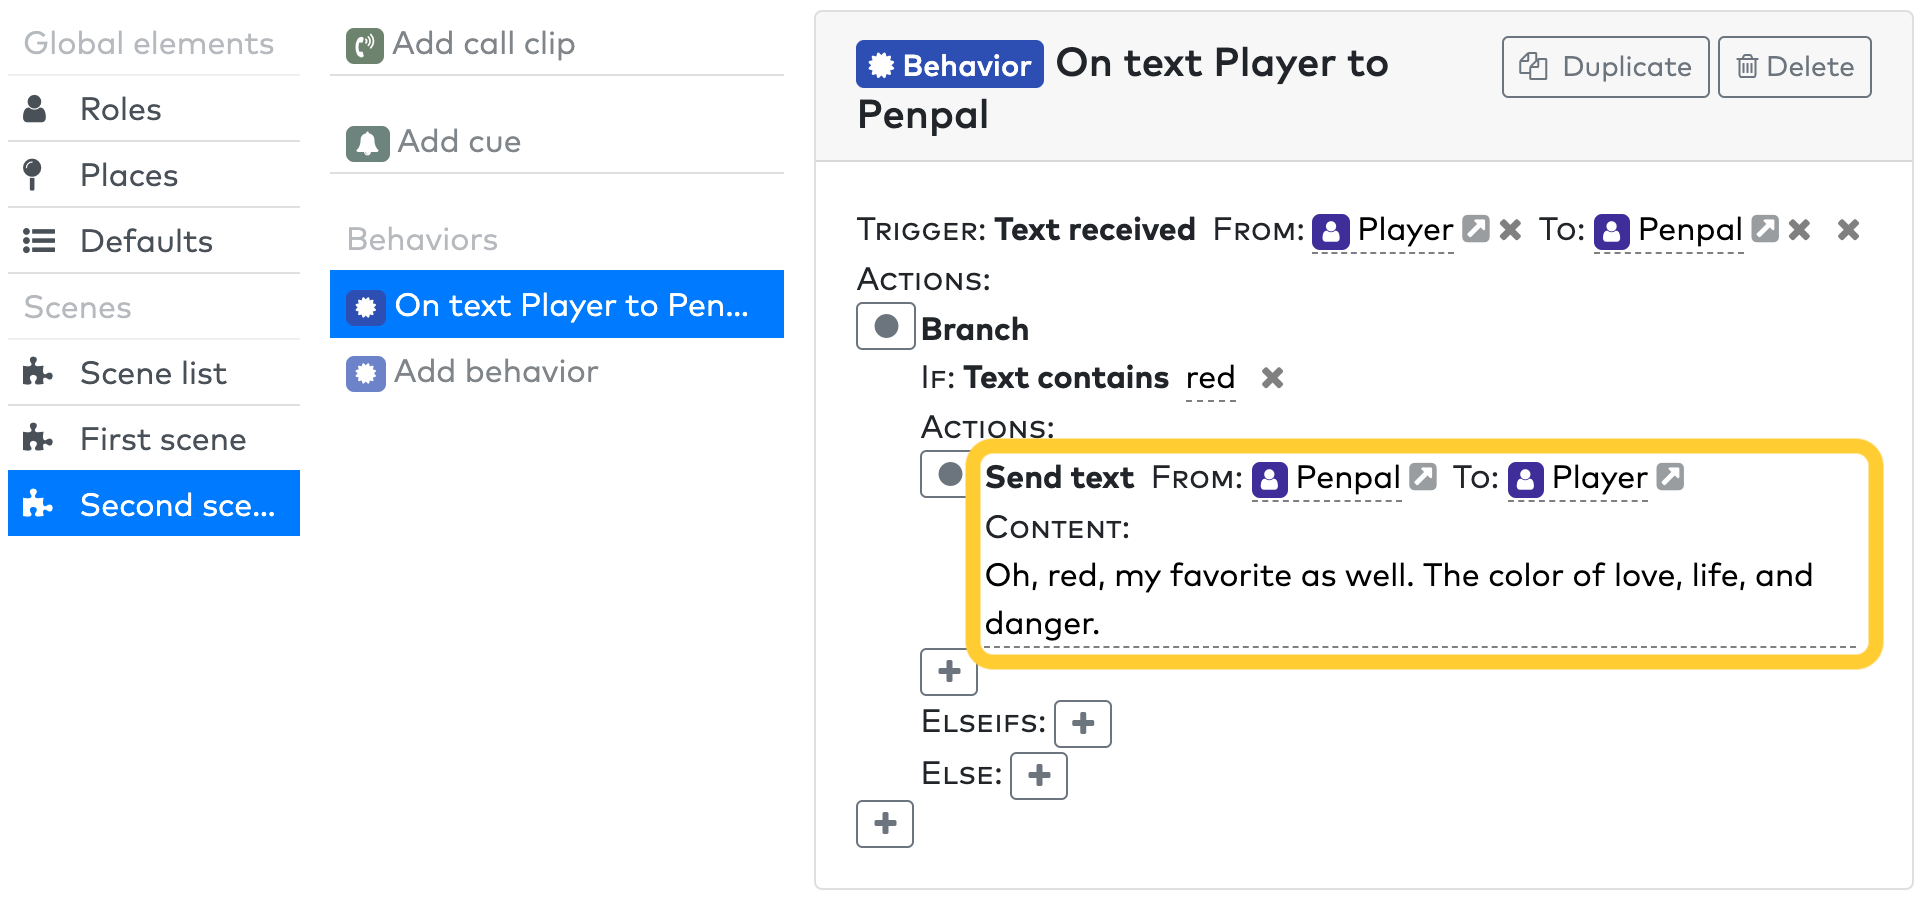
Now let's add a conditional action. The actions in the Actions field of this condition will only be executed if the player's response to this query contains the word "red".
Add a new "Send text" action under this condition, from "Penpal" to "Player" with the content "Oh, red, my favorite as well. The color of love, life, and danger".
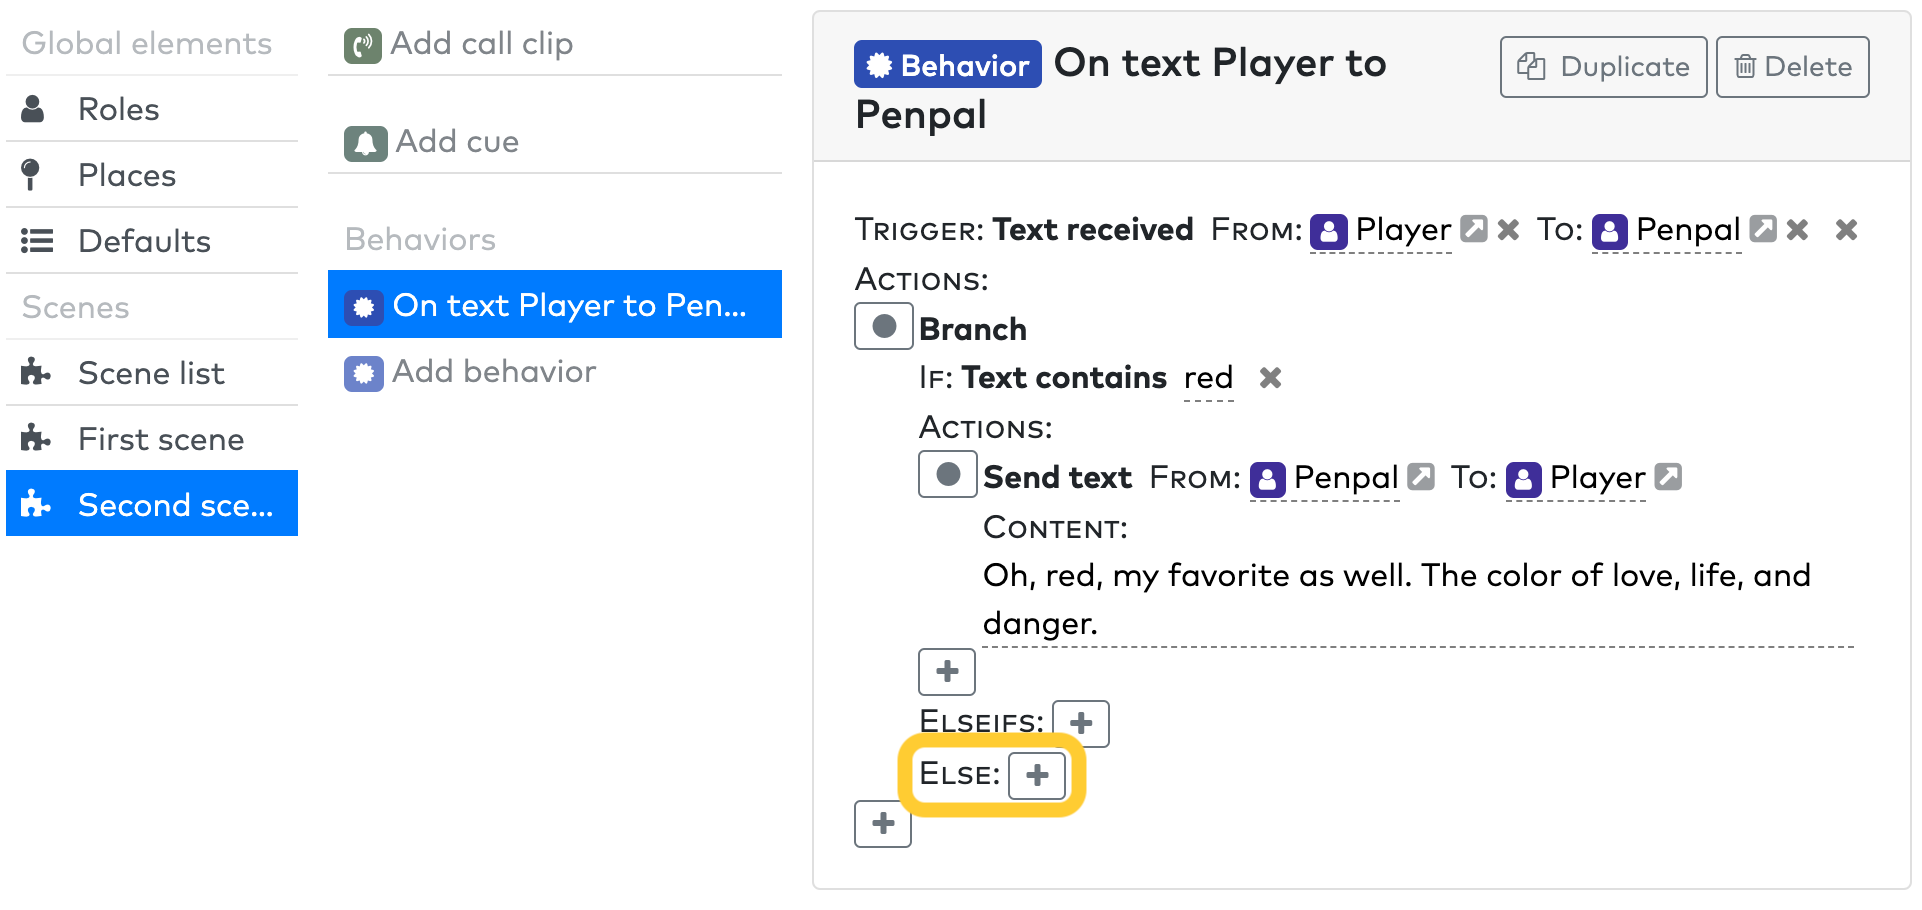
9. Add fallback branch
In the Else field, you can define actions that take place if none of the conditions specified in the If or Elseifs fields pass.
Add a "Send text" action in the Else field, from "Penpal" to "Player" with the Content field "The color {{event.content}}, not my personal choice, but not without its charms.".
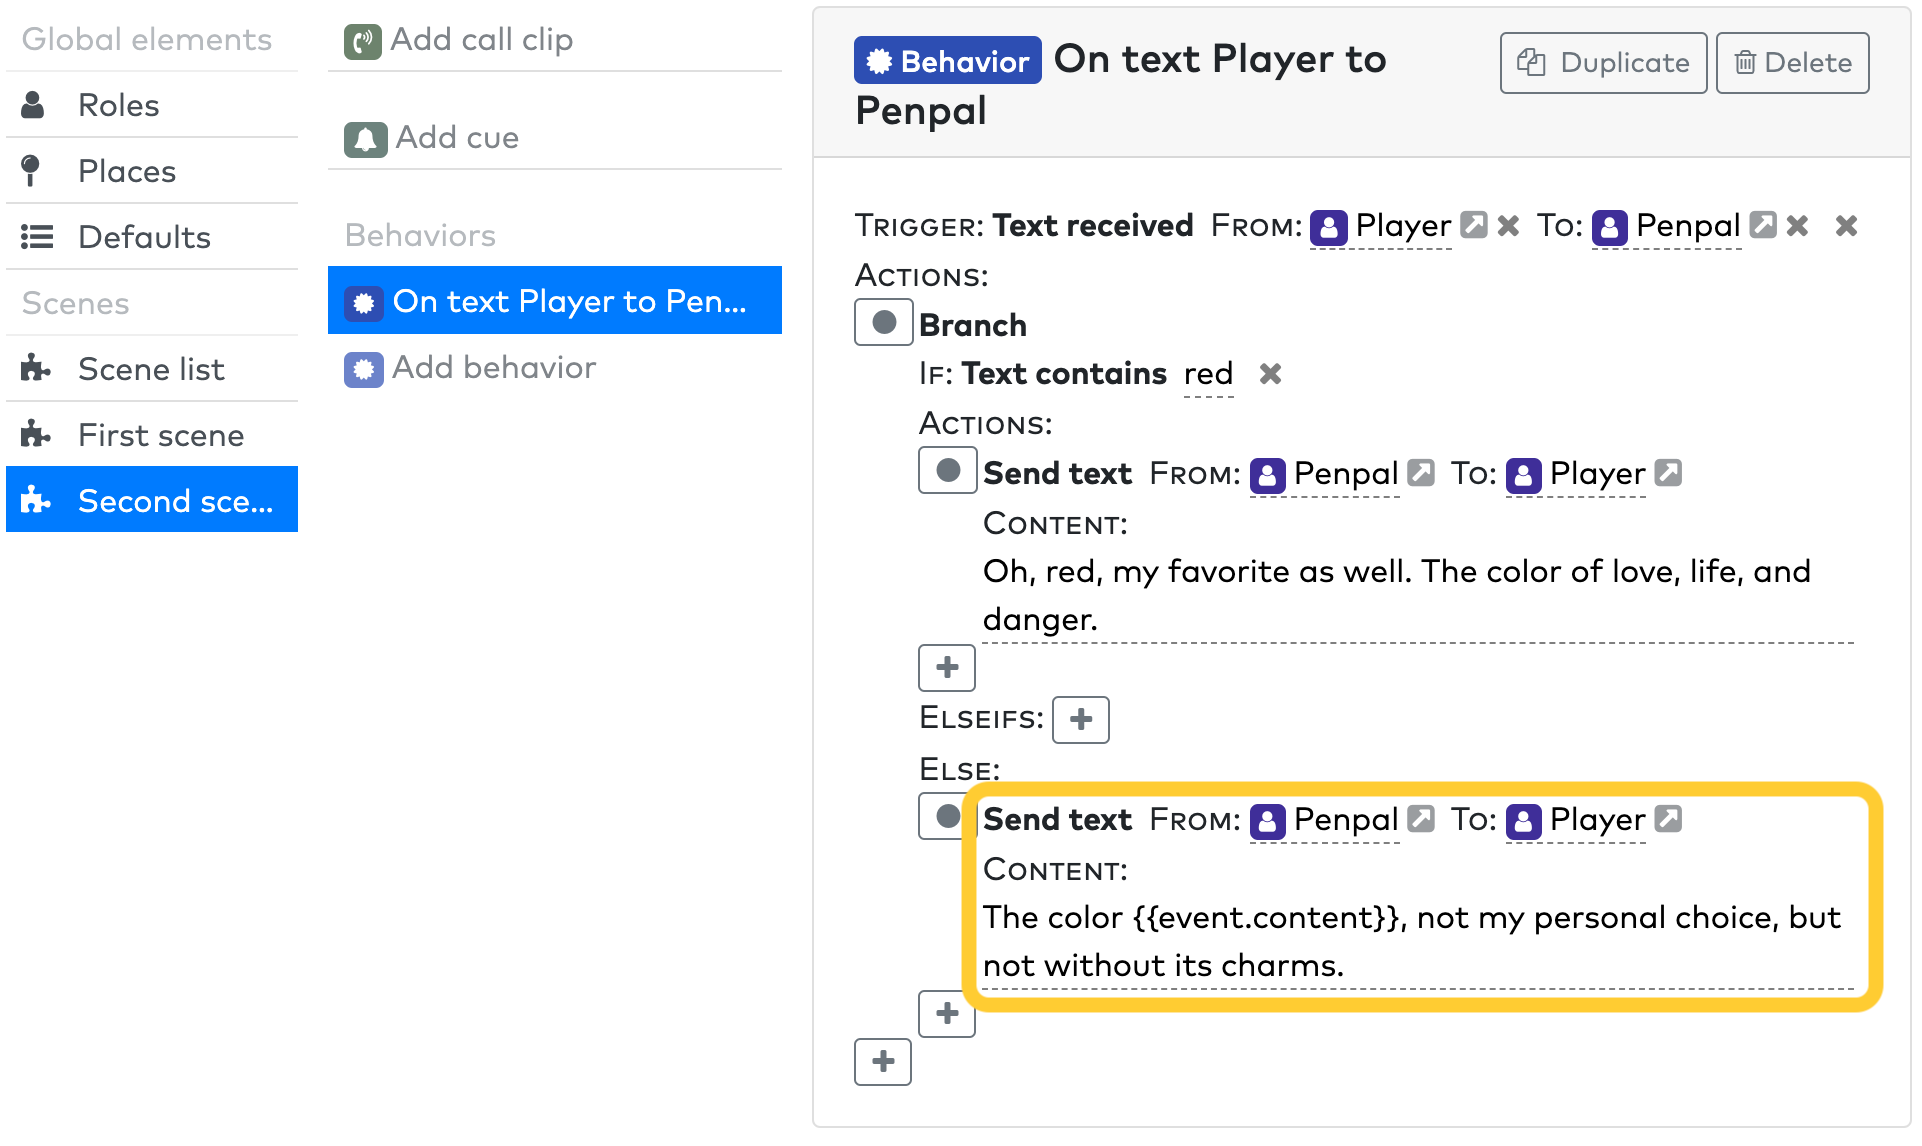
This "{{event.content}}" indicator is a text insertion, which inserts the content of the message that triggered this behavior. You can read more about text insertions on its page in the Concepts section.
10. Test your experience!
You can now test your total experience by texting the number allocated to your experience in the Schedule tab. You can see that if you respond to the message with "Red", the first reply is sent, but if you respond with a different color, the different reply is sent, with the text insertion filled in with the color you replied with.
